This post was originally published in April 2022. Last updated: August 2025.
When you're planning a renovation or construction project, hiring a general contractor is one of the most important decisions you'll make. The right contractor can keep your project running smoothly — coordinating trades, managing timelines, and handling permits — while the wrong one can lead to delays, added costs, and unnecessary stress.
That’s where a general contractor checklist comes in. Taking a clear, step-by-step approach to vetting potential contractors can help you make informed decisions from the very beginning. Whether you're renovating a bathroom, building an addition, or finishing a basement, following a checklist ensures you're asking the right questions, reviewing the right details, and setting your project up for success.
This guide will walk you through what to look for, what to ask, and how to compare your options so you can hire with confidence and get the results you’re after.
Define Your Project Scope and Budget
Before you start reaching out to contractors, it’s important to have a clear idea of what you want to accomplish and what you can afford. You don’t need a full set of blueprints, but the more detail you can provide about your goals, timeline, and expectations, the more accurate and helpful a contractor’s estimate will be.
Start by outlining what you want the finished space to look and feel like. It’s okay if your plans aren’t final since most contractors expect to help you refine them. However, having a solid understanding of your must-haves will help avoid misunderstandings later on. You should also come to the table with a general budget in mind, including a contingency fund for surprises or changes once work begins.
Here are a few steps to help you define your scope and budget before hiring:
Do Your Research
Not all general contractors are created equal. Experience, reliability, and communication style can vary widely, and those differences can have a big impact on your project’s outcome. That’s why doing your homework before hiring is so important.
There are a few reliable ways to find reputable contractors in your area. Personal referrals are a great place to start, so talk to your friends, family, neighbors, or even local building supply stores. Online directories and review sites can also be helpful, especially if you pay attention to how contractors respond to feedback. Once you’ve got a shortlist, check their qualifications. Most areas require general contractors to be licensed and insured, and you should never be afraid to ask for proof.
To make sure you’re choosing someone you can trust, work through the following checklist:
Interview Multiple Contractors
Once you’ve narrowed down your list, it’s time to start having conversations. Interviewing at least three general contractors can give you a better sense of your options — and not just in terms of pricing. It will also show you how each contractor communicates, solves problems, and approaches your specific project.
When you meet with a contractor, ask about their experience with similar renovations, their current availability, and how they manage projects day to day. Pay close attention to how they explain things. Are they clear, confident, and easy to understand? You’ll also want to learn who’ll actually be on-site doing the work and how the contractor supervises subcontractors.
While these conversations are helpful for gathering facts, they’re just as valuable for spotting potential red flags. Vague answers, pushy sales tactics, or a reluctance to provide references could be signs to walk away.
Request and Compare Quotes
Once you’ve finished your interviews, it’s time to gather estimates. A contractor’s quote should be more than just a number. It should clearly outline the scope of work, timelines, payment terms, and what’s included in the price. Don’t be afraid to ask for a breakdown if something seems unclear or too vague.
While it might be tempting to go with the lowest bid, a price that’s significantly cheaper than the others can be a red flag. It could mean the contractor is cutting corners, underestimating the project, or leaving out key expenses that will show up later. On the flip side, a quote that’s much higher should include clear justification — such as premium materials, a faster timeline, or more robust project management.
To help compare apples to apples, here’s what to look for in each quote:
Check References and Credentials
Before you make a final decision, take the time to check references and confirm credentials. It might feel like a formality, but calling former clients can give you valuable insight into how a contractor actually performs once the job begins.
When you connect with past clients, ask about their overall experience. It’s not just about the final result, but how the contractor communicated, handled issues, and stayed on schedule. You’ll often learn things that wouldn’t show up in an online review or portfolio.
It’s also smart to double-check that licenses, insurance policies, and certifications are valid and up to date. These documents protect you if something goes wrong on-site and are a good indicator that the contractor runs a professional operation.
Here’s a quick checklist for this step:
Review the Contract Carefully
Before any work begins, you’ll need to sign a contract, and this document is one of the most important parts of the process. It protects both you and the contractor by clearly outlining expectations, responsibilities, and what happens if something changes.
A solid contractor agreement should be specific and detailed. It needs to cover what work will be done, how much it will cost, how long it will take, and what happens if delays, disputes, or additional work come up. Don’t assume anything. If it’s not in writing, it doesn’t count.
Take your time reviewing the contract and don’t hesitate to ask for clarification or revisions. A reputable contractor won’t mind walking through it with you.
Make sure the contract you sign includes these essentials:
Monitor Progress and Stay Involved
Even with a contractor leading the work, your job isn’t over once construction begins. Staying involved throughout the process helps keep everything on track and ensures you’re not surprised by delays or unexpected changes.
Check in regularly with your contractor and ask for updates on how the project is progressing. If you’re not living in the space during construction, request photos or a quick weekly summary. Keeping an open line of communication goes a long way in preventing misunderstandings and catching issues early.
It’s also a good idea to document any major decisions, changes, or delays in writing, even if they’re discussed in person or over the phone. Having a clear record can help avoid confusion later on.
As the work moves forward, use this checklist to stay engaged:
Understand Warranties and Final Inspection
As your project wraps up, it’s important to make sure all the work was completed properly and that you’re protected if issues arise later. The final inspection — often called a “walk-through” — gives you a chance to catch unfinished tasks, cosmetic issues, or anything that doesn’t match the original scope.
Before signing off, go through the space with your contractor and create a punch list of outstanding items. These might include touch-ups, missing hardware, or minor repairs. Most contractors expect this step and will handle it quickly.
You should also receive any warranties, inspection records, and other documentation tied to the project. Don’t hand over the final payment until you’ve confirmed that everything is done to your satisfaction and any remaining items are scheduled for completion.
To wrap up your renovation with confidence, work through this final checklist:
Trusscore Trusted Installer Program
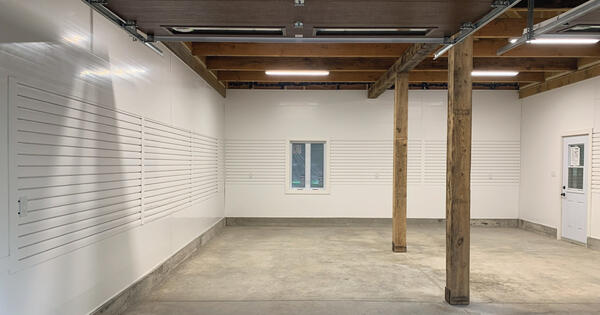
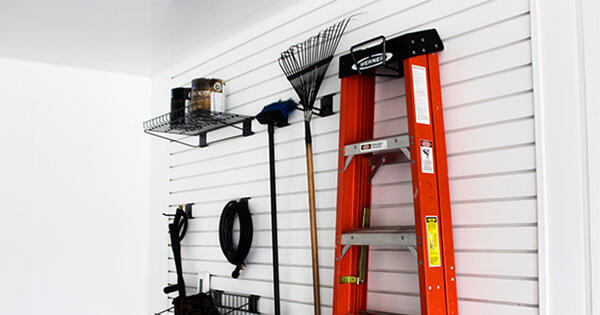
If your renovation involves Trusscore Wall&CeilingBoard or Trusscore SlatWall, it’s worth hiring a contractor who already understands how to work with PVC panels. From using the correct fasteners to making clean, precise cuts, product familiarity can make a big difference in the quality and efficiency of the installation.
The Trusscore Trusted Installer Program connects homeowners with independent contractors who have experience working with Trusscore products. These professionals are vetted for product knowledge and installation history, and they have access to Trusscore’s technical support if needed. Whether you’re finishing a garage, laundry room, or commercial space, working with someone who knows the material helps reduce installation issues and keeps your project moving forward.
To get started, follow this checklist:
Hiring a general contractor is a big step, and it’s one that deserves your full attention. By following a detailed general contractor checklist, you’re setting the stage for a smooth, successful project. From defining your goals and comparing quotes to checking references and monitoring progress, each step helps reduce risks and improve outcomes. It may take a little more time upfront, but it’s time well spent, and it can save you a lot of money and stress down the road.