In the world of DIY and construction, drills and drill bits are essential tools for getting the job done right. In this blog post, we'll cover everything you need to know about drills and bits — from types to techniques — for any project you’re tackling.
Types of Drills
What are the main differences between corded and cordless drills?
When it comes to corded and cordless drills, the main difference lies in their power source.
Corded drills are powered by electricity from an outlet, which offers these three key benefits:
- Unlimited runtime: Since they're connected to a power source, corded drills can run continuously without needing recharging.
- Consistent power: They generally provide more consistent power output, making them suitable for heavy-duty tasks or prolonged use.
- No battery concerns: You won't have to worry about battery life or waiting for batteries to recharge, which can be advantageous for longer projects.
Cordless drills, on the other hand, run on rechargeable batteries, which means you benefit from:
- Portability: Cordless drills offer greater freedom of movement since they're not tethered to an outlet. This makes them ideal for projects where access to power outlets is limited or when working in remote locations.
- Convenience: They're convenient for quick jobs or tasks where mobility is essential, as you can grab your cordless drill and start working without needing to plug it in.
However, cordless drill runtime is limited by battery life, so you may need to recharge or swap out batteries during extended use. Additionally, their power output may decrease as the battery drains. If you prioritize unlimited power and consistent performance, a corded drill might be your best bet. But if portability and convenience are more important to you, a cordless drill could be the way to go.
How do hammer drills differ from regular drills, and when should I use each?
Regular drills are designed for drilling holes in various materials such as wood, plastic, and metal. They operate by rotating the drill bit to create holes through the material. Regular drills are versatile and suitable for a wide range of DIY projects, from hanging shelves to assembling furniture.
Hammer drills are specifically designed for drilling into masonry, concrete, brick, and stone. In addition to rotating like regular drills, they also have a hammering function that applies rapid, short thrusts to the drill bit as it rotates, allowing for more efficient drilling into tough materials. The hammering action helps break up the material as the bit spins, making it easier to penetrate hard surfaces.
If you're unsure whether you need a regular drill or a hammer drill for a particular task, consider the material you'll be working with. If it's anything other than wood, plastic, or metal, a hammer drill is likely the better choice. Use a regular drill for tasks such as drilling holes in wood, plastic, or metal or for driving screws and fasteners.
Battery Types for Cordless Drills
What types of batteries are used in cordless drills, and how do they differ?
Cordless drills commonly use the following types of rechargeable batteries:
- Nickel-Cadmium (Ni-Cd) Batteries: Ni-Cd batteries were once prevalent in cordless drills but are now less common due to their lower energy density and higher susceptibility to memory effect. Memory effect refers to a reduction in the battery's capacity if it's repeatedly recharged before being fully discharged, leading to a loss of usable capacity over time. While Ni-Cd batteries are robust and can withstand high discharge rates, they have been largely replaced by newer battery technologies.
- Nickel-Metal Hydride (NiMH) Batteries: NiMH batteries offer improved energy density compared to Ni-Cd batteries, resulting in longer runtime per charge. They have a lower memory effect, meaning They’re less prone to capacity loss if not fully discharged before recharging. NiMH batteries are more environmentally friendly than Ni-Cd batteries and are commonly used in mid-range cordless drills.
- Lithium-Ion (Li-Ion) Batteries: Li-Ion batteries are the most common type used in modern cordless drills due to their superior energy density, lightweight design, and minimal memory effect. They offer longer runtime, faster charging times, and higher power output compared to NiMH and Ni-Cd batteries. Li-Ion batteries maintain a more consistent voltage throughout the discharge cycle, providing consistent power output until fully depleted.
How long can I expect the battery to last, and are there tips for extending battery life?
The lifespan of a cordless drill battery can vary widely depending on usage and maintenance. On average, a well-maintained Li-Ion battery can last 2 to 5 years or more, while NiMH batteries typically last 1.5 to 3 years. Ni-Cd batteries have a shorter lifespan, typically lasting 1 to 2 years.
Here’s how you can extend a battery’s life to save time and money in the long run:
- Avoid deep discharge: Li-Ion batteries perform best when they're not fully discharged before recharging. Try to recharge them before they're completely drained to maximize their lifespan.
- Store batteries properly: Store batteries in a cool, dry place away from direct sunlight and extreme temperatures. High temperatures can degrade battery performance and shorten lifespan.
- Regular use: Even if you're not using your cordless drill frequently, it's beneficial to give the batteries occasional use and recharge cycles to prevent them from deteriorating due to long periods of inactivity.
- Use the right charger: Always use the charger specifically designed for your cordless drill batteries. Using incompatible chargers can damage the batteries and shorten their lifespan.
- Keep batteries clean: Periodically clean the contacts on both the battery and the drill to ensure a good connection and optimal performance.
Drill Chuck and Keyless Chuck
What is a keyless chuck, and how does it work?
A keyless chuck is a type of chuck commonly found on drills that allows you to change drill bits quickly and easily without the need for a chuck key. Here's how it works:
- A keyless chuck typically consists of three jaws that can be tightened or loosened by hand.
- To insert a drill bit, you simply hold the outer sleeve of the chuck in place with one hand while turning the drill's body with the other hand.
- As you turn the body of the drill, the jaws inside the chuck will close around the shank of the drill bit, securing it in place.
- To remove the drill bit, you reverse the process by holding the outer sleeve and turning the drill body in the opposite direction, causing the jaws to open and release the bit.
Are there advantages to using a keyless chuck over a keyed chuck?
There are several advantages to using a keyless chuck over a keyed chuck:
- Convenience: The most significant advantage of a keyless chuck is convenience. Since it doesn't require a chuck key, you can change drill bits quickly and easily, saving you time and hassle, especially when you need to switch between different sizes of drill bits frequently during a project.
- No Need for Additional Tools: With a keyless chuck, you don't have to worry about keeping track of a separate chuck key or fumbling with it to change drill bits. This makes the process more streamlined and efficient.
- Single-Handed Operation: Keyless chucks can often be operated with just one hand, allowing you to hold the drill steady with your other hand while you change bits. This can be particularly useful when working in tight spaces or awkward positions where using both hands may not be practical.
- Less Risk of Losing Parts: Since keyless chucks don't require a chuck key, there's less risk of misplacing or losing parts of the chuck assembly, such as the chuck key itself. This can help keep your workspace organized and reduce the likelihood of downtime due to missing tools.
Drill Speeds and Torque
How do I adjust the speed and torque settings on a drill?
Most modern cordless drills come equipped with variable speed and torque settings, allowing you to adjust the drill's performance to suit different materials and applications.
To adjust your drill’s speed settings, do the following:
- Look for the speed control trigger or switch on your drill. This is typically located near the trigger or on the body of the drill.
- Pressing the trigger partially will result in lower speeds while pressing it fully will engage the drill at maximum speed.
- Some drills have a speed control dial or switch that allows you to set the desired speed more precisely.
Many cordless drills feature a clutch or torque control collar near the chuck. This collar can usually be rotated to select different torque settings.
The torque settings control the amount of rotational force (torque) applied by the drill when driving screws or fasteners. Higher torque settings are suitable for driving larger screws into dense materials, while lower torque settings are better for smaller screws or delicate materials to prevent over-tightening or stripping.
What speed is appropriate for different materials or applications?
Choosing the appropriate speed for your drilling task is essential for achieving optimal results and prolonging the life of your drill bits. Here are some general guidelines for selecting drill speeds based on different materials or applications:
- Wood: For drilling holes in wood, moderate to high speeds are generally appropriate. Start with a medium speed and adjust as needed based on the size of the drill bit and the hardness of the wood. Larger drill bits and softer woods may require slower speeds to prevent overheating and burning, while smaller bits and harder woods can tolerate higher speeds.
- Metal: When drilling into metal, slower speeds are typically recommended to avoid overheating and preserve the integrity of the drill bit. Use lubricant or cutting oil to reduce friction and heat buildup when drilling through metal, especially harder materials like steel or aluminum.
- Plastic: Plastic materials are relatively soft and can melt if drilled at high speeds. Start with a low to medium speed and increase gradually as needed. Use light pressure and avoid excessive force to prevent cracking or splintering the plastic.
- Masonry/Concrete: When drilling into masonry or concrete, use a hammer drill mode (if available) and lower speeds to effectively penetrate the material. Use carbide-tipped masonry drill bits designed specifically for drilling into hard materials and periodically withdraw the bit to clear away debris.

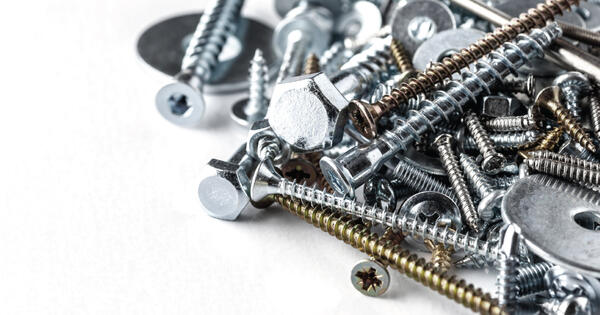
Choosing the Right Drill Bit
How do I select the right drill bit for a specific material (wood, metal, masonry)?
Selecting the right drill bit for a specific material is crucial for achieving clean, precise holes without damaging the material or the bit itself. Here's how to choose the appropriate drill bit for wood, metal, and masonry, along with information about multi-material drill bits:
| Material Type | Recommendation |
|---|---|
| Wood | For drilling into wood, standard twist drill bits are most commonly used. These bits have a sharp, pointed tip and spiral flutes that help remove wood chips as the bit rotates.For clean, splinter-free holes, consider using brad-point or spur-point drill bits designed specifically for woodworking. These bits have a center point that helps guide the bit accurately and prevent wandering. |
| Metal | When drilling into metal, high-speed steel (HSS) drill bits are the standard choice. HSS bits are hardened and can withstand the high temperatures generated by drilling through metal. For harder metals like stainless steel or hardened steel, consider using cobalt or titanium-coated drill bits, which offer greater durability and heat resistance. |
| Masonry/Concrete | Masonry drill bits, also known as carbide-tipped or percussion bits, are designed for drilling into hard materials like concrete, brick, and stone. These bits feature a carbide tip that is harder than the material being drilled, allowing them to effectively penetrate masonry surfaces.For best results, use a hammer drill mode (if available) and apply firm, steady pressure while drilling to prevent the bit from overheating. |
Are there multi-material drill bits that work well for various surfaces?
Multi-material drill bits are designed to work well on various surfaces, including wood, metal, and masonry. These versatile bits typically feature a carbide or high-speed steel tip with a special geometry that allows them to cut through different materials efficiently. Here are some key points about multi-material drill bits:
- Versatility: Multi-material drill bits are ideal for DIYers and professionals who frequently work with a variety of materials and need a single, versatile solution for drilling holes.
- Durability: These bits are engineered to withstand the demands of drilling through different materials without prematurely dulling or breaking.
- Efficiency: While multi-material drill bits can be effective for drilling into wood, metal, and some types of masonry, they may not provide the same level of performance as dedicated drill bits designed specifically for each material.
- Considerations: When using multi-material drill bits, it's essential to adjust the drill speed and apply the appropriate amount of pressure based on the specific material you're drilling into to ensure optimal results.
Bit Shank Types
What are the differences between round shank and hex shank drill bits?
- Round shank drill bits have a cylindrical shaft that is smooth and uniform in diameter from the tip to the base. They’re compatible with most traditional drill chucks that grip the bit securely using jaws or a key. Round shank drill bits are commonly used in corded and cordless drills for a wide range of drilling applications, including wood, metal, and plastic.
- Hex shank drill bits have a hexagonal-shaped shaft that provides additional surface area for gripping and prevents slippage in the chuck. They’re primarily used with quick-change drill chucks that feature a hexagonal chuck design, allowing for fast and easy bit changes without the need for a chuck key. Hex shank drill bits are popular in impact drivers and hex-shank-compatible drills, as well as in applications where rapid bit changes are required, such as assembly work or construction.
Can I use any type of drill bit with my drill, or do I need a specific shank type?
Whether you can use any type of drill bit with your drill depends on the chuck design and compatibility with the bit's shank type:
- Round Shank Drills: Most traditional corded and cordless drills feature standard three-jaw chucks that are compatible with round shank drill bits. Round shank drill bits can be used in most drills equipped with standard chucks, making them versatile for a wide range of drilling tasks.
- Hex Shank Drills: Hex shank drill bits are specifically designed for use with hex-shank-compatible drills, including impact drivers and quick-change drill chucks. While some drills may accept both round and hex shank bits, it's essential to ensure compatibility with the chuck type and shank size to prevent slippage or damage to the drill or bit.
When selecting drill bits for your drill, consider the chuck design and compatibility with the bit's shank type.
Drilling Depth and Depth Stops
How do I set the drilling depth on my drill?
Setting the drilling depth on your drill ensures precise and consistent results:
- Depth Gauge: Many modern drills come equipped with a depth gauge or depth stop feature that allows you to set the desired drilling depth accurately. The depth gauge is typically located on the side or base of the drill and consists of a rod or collar that can be adjusted to limit the travel of the drill bit.
- Manual Measurement: If your drill does not have a built-in depth gauge, you can manually measure and mark the desired drilling depth on the drill bit using a piece of tape, a marker, or a depth gauge tool. Simply measure the desired depth on the drill bit and mark it with a reference point, such as a line or dot, to indicate the maximum depth to which you want to drill.
Are there depth stops or guides available to ensure consistent drilling depths?
Ensuring consistent drilling depths is crucial for achieving professional results, and depth stops and depth guides can help.
Some drills come with depth stop accessories that attach to the drill's chuck or collar, allowing you to set precise drilling depths. Depth stops typically consist of a collar with adjustable set screws that can be tightened to limit the travel of the drill bit, preventing it from drilling beyond the desired depth. These accessories are useful for repetitive drilling tasks that require consistent drilling depths, such as installing hardware or dowels.
Depth guides are accessories that attach to the drill bit itself and provide a visual reference for setting drilling depth. They often consist of a collar or ring that slides along the length of the drill bit and can be adjusted to the desired depth. Depth guides are particularly helpful for drilling holes to a specific depth without the need for manual measurement or markings.
In addition to using these accessories, here are a few other ways to ensure consistent drill depths:
- Practice on Scrap Material: Before drilling into your workpiece, practice setting the drilling depth on a scrap piece of the same material to ensure accuracy and consistency.
- Check Depth Periodically: Periodically check the drilling depth during drilling to ensure that you're not exceeding the desired depth, especially when drilling through thick or dense materials.
- Adjust Speed and Pressure: Adjust the drilling speed and pressure based on the material being drilled to prevent overheating and achieve clean, precise holes at the desired depth.

Masonry and Concrete Drilling
What type of drill bit should I use for drilling into concrete or masonry?
For drilling into concrete, brick, or masonry, you'll need to use a specialized drill bit designed for these hard materials. The most common type of drill bit for this purpose is the masonry or carbide-tipped drill bit. These drill bits feature a carbide or tungsten carbide tip that is specifically engineered to withstand the hardness of masonry surfaces and effectively penetrate them.
Are there specific techniques for drilling into hard materials?
When drilling into hard materials, do the following:
- Select the Right Drill and Drill Bit: Choose a drill with a hammer drill mode, which provides a hammering action in addition to the rotational motion, facilitating drilling into hard materials. Use a masonry or carbide-tipped drill bit with a diameter appropriate for the size of the hole you need to drill.
- Mark the Drilling Location: Use a pencil or marker to mark the precise location where you want to drill the hole. You can also use a center punch to create a small indentation as a starting point for the drill bit.
- Wear Personal Protective Equipment (PPE): When drilling into hard materials like concrete or masonry, wear safety glasses, gloves, and a dust mask to protect yourself from flying debris and dust.
- Drilling Technique: Start the drill at a low speed to prevent the bit from slipping on the surface, especially if you're drilling into smooth or polished concrete. Apply steady, firm pressure to the drill while keeping it perpendicular to the surface. Avoid using excessive force, as this can cause the drill bit to overheat or become damaged. Periodically withdraw the drill bit to clear away debris and prevent it from becoming clogged.
- Use Water or Lubricant: If you're drilling into particularly hard or dense materials, consider using water or a lubricant to cool the drill bit and reduce friction. This can help prevent overheating and prolong the life of the drill bit.
- Monitor Depth and Progress: Keep an eye on the drilling depth and progress to ensure that you're drilling to the desired depth without going too deep. If necessary, use a depth gauge or mark the drill bit with tape to indicate the desired drilling depth.
- Allow Cooling Time: After drilling for an extended period, allow the drill bit to cool down to prevent overheating and maintain its cutting effectiveness.

Metalworking Drill Bits
What type of drill bit is suitable for drilling through metal?
The most common type of drill bit used for drilling through metal is the high-speed steel (HSS) drill bit. HSS drill bits are designed to withstand the high temperatures generated by drilling through metal and can cut through various types of metal, including steel, aluminum, brass, and copper.
| Metal Type | Recommendation |
|---|---|
| Steel | When drilling through steel, use HSS drill bits for general-purpose drilling. For hardened steel, opt for cobalt drill bits for better performance and longevity.Use cutting oil or lubricant to reduce friction and heat buildup when drilling through steel, especially thicker or harder grades. |
| Aluminium | Aluminum is a softer metal compared to steel, so HSS drill bits are typically sufficient for drilling through aluminum. Use moderate drilling speeds and light pressure to prevent the drill bit from grabbing or binding in the metal |
| Brass and Copper | Brass and copper are relatively soft metals that can be drilled with HSS drill bits using similar techniques to drilling through aluminum. Be cautious of work hardening, especially when drilling through thicker sections of brass or copper. Reduce drilling speed if you notice the metal becoming harder as you drill. |
| Stainless Steel | Stainless steel is a challenging material to drill due to its hardness and toughness. For drilling through stainless steel, cobalt drill bits are recommended for better performance and durability. Use cutting oil or lubricant to prevent work hardening and extend the life of the drill bit. Drilling at slower speeds can also help reduce heat buildup and improve cutting efficiency. |
| Cast Iron | Cast iron is a brittle material that requires careful drilling to avoid chipping or cracking. HSS drill bits are suitable for drilling through cast iron, but carbide-tipped drill bits may offer better performance and longevity. Use low drilling speeds and steady, even pressure to prevent the drill bit from wandering or snagging in the material. |
Spade Bits vs. Hole Saws
When should I use spade bits, and when is it more appropriate to use hole saws?
Spade bits, also known as paddle bits or flat wood bits, are ideal for drilling large-diameter holes in wood and other soft materials. Here's when you should use spade bits:
- Woodworking Projects: Spade bits are commonly used in woodworking for drilling holes for pipes, cables, dowels, or large bolts. They excel at drilling fast and clean holes in softwoods and some hardwoods, making them suitable for a wide range of woodworking applications.
- Rough Construction Work: Spade bits are also useful for rough construction work, such as framing or installing large fixtures, where precision is less critical, and speed is a priority.
- Size Range: Spade bits are available in a variety of sizes, ranging from small diameters (e.g., 1/4 inch) to larger sizes (e.g., 1-1/2 inches or more). While spade bits can drill holes of various sizes, They’re typically best suited for larger diameter holes due to their design and cutting action.
Hole saws consist of a cylindrical saw blade with teeth around the perimeter and a pilot drill bit in the center.
They’re versatile tools suitable for drilling large-diameter holes in a wide range of materials. Here's when to use hole saws:
- Drilling Large Holes: Hole saws are ideal for drilling large-diameter holes in wood, plastic, metal, and even some masonry materials. They’re commonly used for tasks such as installing door locks, cutting holes for plumbing or electrical fixtures, or creating holes for vents or ducts.
- Precision Drilling: Hole saws offer better precision and cleaner cuts compared to spade bits, making them suitable for applications where accuracy is essential. They produce less tear-out and splintering, resulting in smoother hole edges and a neater finish.
Are there size limitations for these types of bits?
While spade bits and hole saws come in various sizes, there are practical limitations to consider:
- Drill Capacity: The maximum hole size you can drill with a spade bit or hole saw depends on the capacity of your drill. Larger holes may require a more powerful drill or a drill press to ensure efficient drilling.
- Material Thickness: Consider the thickness of the material you're drilling into when selecting the appropriate size of spade bit or hole saw. Thicker materials may require larger diameter bits or saws to accommodate the desired hole size.

Countersink Bits
When is it necessary to use a countersink bit?
Countersink bits are used to create conical recesses in materials such as wood, plastic, or metal. These recesses accommodate the heads of screws, allowing them to sit flush with or slightly below the surface of the material. Here's when it's necessary to use a countersink bit:
- Flush Mounting of Screws: When you want the heads of screws to sit flush with the surface of the material, countersinking is necessary to create a recess that accommodates the screw head.
- Preventing Splintering or Splitting: Countersinking helps prevent splintering or splitting of the material around the screw head, especially in wood, by distributing the pressure evenly.
- Enhancing Aesthetics: Countersinking screws creates a clean and professional-looking finish, enhancing the aesthetics of woodworking or construction projects.
- Reducing Interference: In applications where multiple materials or components are joined together, countersinking helps reduce interference between screw heads and adjacent surfaces.
Are there different types of countersink bits for different screw types?
There are various types of countersink bits available, designed to accommodate different screw types and materials:
- Single-Flute Countersink Bits: Single-flute countersink bits have a single cutting edge and are suitable for use with wood, plastic, and softer metals. They’re versatile and can accommodate a wide range of screw sizes and types.
- Multi-Flute Countersink Bits: Multi-flute countersink bits have multiple cutting edges and are designed for faster and cleaner cutting, especially in harder materials like metal. They provide smoother finishes and are often preferred for precision work.
- Combination Countersink/Counterbore Bits: Combination bits are designed to create both a countersink (for the screw head) and a counterbore (for the screw body) in a single operation. They’re commonly used in woodworking for applications where the screw head needs to be concealed entirely within the material.
- Adjustable Countersink Bits: Adjustable countersink bits allow you to vary the size and depth of the countersink to accommodate different screw sizes and materials. They offer versatility and flexibility in a wide range of drilling applications.
- Specialty Countersink Bits: Specialty countersink bits are available for specific screw types, such as flat-head or oval-head screws. These bits are designed to create precise countersinks that match the shape and dimensions of the corresponding screw heads.
When selecting countersink bits, consider the type of screws you'll be using:
- Flat-Head Screws: Flat-head screws require countersinks with flat-bottomed recesses to accommodate their heads.
- Oval-Head Screws: Oval-head screws may require countersinks with elliptical or oval-shaped recesses to match the contour of their heads.
- Round-Head Screws: Round-head screws typically require standard countersinks with conical recesses to allow the heads to sit flush with the material surface.
Installing Trusscore Wall&CeilingBoard with a Drill
Are there any tips to keep in mind when using a drill to install Trusscore Wall&CeilingBoard?
When installing Trusscore Wall&CeilingBoard with a drill and the appropriate screw for the material you’re installing the panel on top of, it’s important to keep these tips in mind:
- Don’t over-tighten screws.
- Allow a minimum of 1/16” — about the thickness of a dime — between the back of the screw head and the screw flange.
- Always fasten in the center of the screw flange slots because fastening at the end of the slots can cause the panels to buckle or distort.
- Screws must be installed straight and level to allow for movement.
- Screws should penetrate a minimum of 1” into solid backing.
- Screws must be no more than 24” apart.

For more information about installing Trusscore Wall&CeilingBoard, download our installation guide.
Bit Storage and Organization
How do I store drill bits to keep them organized and easily accessible?
Storing drill bits in an organized and easily accessible manner is essential for maintaining their condition and ensuring efficient use. Here are some tips for storing drill bits effectively:
- Toolboxes or Tool Bags: Toolboxes or tool bags with compartments or pockets are suitable for storing drill bits along with other tools. Look for toolboxes with removable trays or organizers that allow you to customize the layout to accommodate different sizes of drill bits.
- Drawer Organizers: Drawer organizers with multiple compartments are ideal for storing drill bits neatly in a workshop or garage drawer. Choose organizers with adjustable dividers to create custom-sized compartments for various types and sizes of drill bits.
- Wall-mounted Tool Racks: Wall-mounted tool racks or pegboards equipped with hooks or clips can be used to hang drill bits, keeping them visible and easily accessible. Arrange drill bits by size or type on the tool rack for quick identification and retrieval.
- Rotating Carousel Organizers: Rotating carousel organizers with multiple tiers or compartments are convenient for storing drill bits on a workbench or shelf. These organizers allow you to spin the carousel to access different drill bits quickly without rummaging through a cluttered toolbox.
Are there cases or containers designed specifically for drill bit storage?
If you’re looking for cases or containers specifically designed for drill bit storage, consider the following options:
- Drill Bit Cases: Many drill bit manufacturers offer specialized cases or containers designed specifically for drill bit storage. These cases often feature labeled compartments or slots for different sizes and types of drill bits, keeping them organized and easy to find.
- Indexing Drill Bit Cases: Indexing drill bit cases have indexed tabs or guides that allow you to quickly locate the desired drill bit size or type. These cases typically have clear lids or windows, allowing you to see the contents without opening the case.
- Stackable Containers: Stackable containers with individual compartments or trays are useful for storing drill bits and other small accessories. Choose containers with locking lids or secure closures to prevent drill bits from spilling or getting lost during transportation.
Drill Accessories
What are some useful accessories for drills, such as drill guides or angle attachments?
Drills are versatile tools that can be enhanced with a variety of accessories to expand their capabilities and adapt them to different tasks. Here are some useful guides and angle attachments for drills to consider adding to your toolkit:
- Drill Guide Blocks: Drill guide blocks attach to the drill and provide a vertical or angled surface for drilling holes precisely perpendicular to the workpiece. They’re useful for drilling straight holes in wood, metal, or plastic, especially in situations where accuracy is critical.
- Portable Drill Guides: Portable drill guides are standalone devices that clamp onto the workpiece and guide the drill bit at a specific angle or depth. They’re handy for drilling angled or repetitive holes with consistent accuracy, such as dowel joints or pocket holes.
- Right Angle Drill Attachments: Right angle drill attachments allow you to drill in tight spaces or at awkward angles where a standard drill may not fit. They feature a compact design with a gear mechanism that transfers the drill's rotational motion to a right-angle output.
- Adjustable Angle Drill Adapters: Adjustable angle drill adapters provide flexibility for drilling at various angles, allowing you to adjust the angle of the drill bit to suit the task. They’re useful for tasks such as drilling holes for cable routing or installing hardware in tight or hard-to-reach spaces.
Are there attachments that can turn a drill into a different tool, like a sander or buffer?
Yes, there are.
Some manufacturers offer drill-to-sander conversion kits that allow you to convert your drill into a handheld sander. These kits typically include sanding pads, sandpaper discs, and attachments that mount onto the drill chuck to transform it into a rotary sander.
Buffer/polisher attachments can be attached to drills to convert them into handheld buffing or polishing tools. They’re suitable for buffing or polishing surfaces such as metal, wood, or automotive paint, providing a quick and convenient way to achieve a smooth, glossy finish.