Renovating an unfinished basement is more than just a project — it's an investment in your home's potential. And since you’re starting from scratch, there’s more thought and planning required to ensure your finished basement is functional and future proofed.
In this blog post, we dive into everything you need to think about when taking on a DIY unfinished basement project.
Planning Your Basement Renovation
Before you break out the paint cans and power tools, take a step back and assess your unfinished basement. Your budget, space limitations, and envisioned functionalities will guide your plan. Think of it as the blueprint for your basement's makeover — make it realistic, and you're halfway there. Here are some considerations and tips to help you create a realistic plan to finish your basement with your needs and preferences in mind:
- Define Your Purpose. Determine how you want to use the basement — whether it's a home office, entertainment space, guest suite, gym, or a combination of purposes. This will help you plan your layout and determine your budget for the project.
- Set a Realistic Budget. Establish a budget that accounts for renovating and furnishing or decorating your basement. In the U.S., finishing a basement typically costs between $4,000 to $34,500, with the national average being around $20,000. Allocate a portion of your budget — about 10% in total — for unforeseen expenses that may arise during the renovation.
- Assess Space Limitations. Accurate measurements are crucial for planning the layout and selecting appropriately sized furniture. Ensure there’s sufficient headroom in your basement, especially if you plan to finish the ceiling.
- Plan the Layout. Sketch out a layout to visualize the arrangement of rooms, furniture, and key features. Make your layout facilitates easy movement throughout your basement and easy access to different areas or rooms.
- Set a Timeline. Establish a realistic timeline for the renovation, considering the scope of work, your skillset, and any potential disruptions.
- Check Local Regulations. Ensure your renovation plans comply with building codes and obtain any necessary permits ahead of time. If needed, consult with contractors, architects, or structural engineers for expert advice.


How to Prepare Your Unfinished Basement Ahead of Renovations
Preparing your unfinished basement before starting DIY renovation projects is a crucial step to ensure a successful and problem-free transformation. Here are some steps you should take:
- Clear Out Clutter. Declutter the space by getting rid of any items you don't need or want in the renovated basement. Sort and organize items that you plan to keep.
- Inspect for Moisture and Leaks. Look for tell-tale signs of water damage like water stains, mold, or mildew on walls and floors. Fix any leaks or water damage issues immediately. If your basement is at risk of flooding, consider installing a sump pump — your future self will thank you.
- Check Your Ventilation and Air Circulation. Musty odors, high humidity, mold growth, stagnant air, and excessive condensation are all signs that your basement is poorly ventilated. You’ll want to address these issues before starting your basement renovation. If your basement tends to be damp, also add a dehumidifier to your shopping list.
- Seal Any Cracks and Gaps. Seal any visible cracks or gaps in the foundation to prevent water infiltration and drafts. Depending on the severity of the cracks, you may need to call in professional reinforcements to help.
- Test for Radon. Radon is a concern in several provinces and states across North America. If your region has high radon levels, conduct a radon test early in your renovation. Depending on the levels, you’ll need to invest in a sub-slab depressurization system, which draws radon gas from the soil and vents it safely outdoors through a dedicated pipe.
- Clean and Disinfect Your Space. Remove dust and debris from the floor and corners. Clean surfaces with a solution that disinfects and prevents the growth of mold and mildew.
- Evaluate Electrical and Plumbing. Before installing insulation or wall materials, check the condition of your electrical wiring for any problems and your plumbing for leaks or signs of corrosion.
- Remove or Treat Mold and Mildew. If you find mold in your basement, you’ll need to treat affected areas yourself or hire mold remediation professionals.
- Locate Utility Shut Offs. Identify and mark the locations of gas, water, and electrical shut-off points for easy access during renovations.
- Prep for Future Wiring and Plumbing. If you plan to add electrical outlets or plumbing fixtures in the future, it's easier to plan for them during the initial stages of renovation.
By taking these steps to clean, organize, and address potential issues in your unfinished basement, you'll be better prepared for a smooth DIY renovation process.
Designing a Functional Layout for Your Basement
Designing a functional layout for your basement depends on its size, purpose, and your specific needs.
Homeowners often opt to keep their basements as an open, multipurpose space that can be used as a family room, entertainment area, or for a combination of uses If this is your plan, dedicate one area to a TV, gaming, or media center, arrange comfortable seating for family and guests, and define specific areas using rugs to create visual separation.
If you’re planning to segment your basement into rooms, here are some ideas of rooms to build into your layout:
- Create a dedicated workspace for remote work, studying, or a home office.
- Design a home gym with room for exercise and wellness activities and organize your equipment with shelves, storage units, or Trusscore SlatWall.
- Carve out a creative workspace for crafting, DIY projects, or hobbies.
Regardless of how you want to use your space, keep these tips in mind:
- Position functional areas near existing windows or consider adding artificial lighting to brighten the space.
- Define specific zones for different functions using furniture arrangements, area rugs, or other visual cues.
- Arrange furniture to allow easy movement and avoid blocking pathways.
- Opt for modular or multifunctional furniture that can adapt to different uses.
- Incorporate ample storage solutions for each designated area to keep the space organized.
Before finalizing your layout, consider the specific needs of your household and how you plan to use the basement. Customizing the design to match your preferences and lifestyle will result in a more functional and enjoyable space.
Budget & DIY-Friendly Flooring Options for Unfinished Basements
Choosing budget-friendly and DIY-friendly flooring options for your basement is a smart approach. Here are some cost-effective and DIY-friendly flooring choices suitable for basements:
- Vinyl plank flooring is an affordable, water-resistant, durable option for homeowners that are available in wood and tile looks and come in click-lock or peel-and-stick varieties that make installation straightforward for DIYers.
- Laminate flooring is cost-effective, easy to install, and comes in a range of styles. Most laminate flooring options also feature click-lock systems to ensure an easy install, and the panels are resistant to scratches and moisture when they’re put in place.
- Engineered wood flooring is more affordable than solid wood, and some options are suitable for basements, but it’s important to choose engineered wood with a moisture-resistant core.
- Carpet tiles are affordable, easy to install, and versatile. If one gets damaged, you can replace it individually. However, in basements, you should consider using moisture-resistant adhesive or installing a waterproof subfloor system to prevent future headaches.
- Painted concrete is an extremely budget-friendly and DIY-friendly option that only requires you to clean and prep the concrete surface before applying concrete paint or stain. For added protection, consider adding a step and applying sealer for added protection.
Regardless of which flooring type you choose, keep these tips in mind when completing your DIY installation:
- Always follow the manufacturer's installation guidelines.
- Ensure the subfloor is clean, dry, and level before installing any flooring material.
- Invest in or rent the necessary tools for the specific flooring type you choose.
- Allow flooring materials to acclimate to the basement environment before installation.
Remember that each flooring type has its pros and cons, and the best choice depends on your preferences, budget, and the specific conditions of your basement. Consider consulting with flooring professionals or seeking advice at your local home improvement store for guidance based on your unique situation.
Moisture-Resistant Drywall Alternatives to Finish Your Basement Walls
Basement walls endure a lot — moisture, temperature swings, and the occasional neglect. While drywall is a common choice, there are alternative materials that offer better resistance to moisture. Here are some materials to consider for finishing your basement walls:
- Mold-Resistant Drywall. An upgraded alternative to traditional drywall, mold-resistant drywall has a gypsum core that’s specially treated to resist mold growth. But despite its best efforts, this drywall doesn’t provide the same level of protection against other moisture-related problems like warping, swelling, or degradation, and can require costly repairs down the line.
- PVC Panels. PVC wall panels like Trusscore Wall&CeilingBoard are durable, lightweight, 100% moisture resistant, and bring a modern touch to your basement. They’re pre-finished and require no special tools or skills to install, making it a dream for DIYers to install. They’ll never grow mold or mildew and will protect your basement walls from future water damage in the event of a flood. Plus, the panels clean up with soap and water, so they’ll always look their best.
- Beadboard or Wainscoting. Beadboard or wainscoting is a decorative paneling installed on the lower part of interior walls, typically made of wood, with grooves or beads that add texture and visual interest. Beyond its aesthetic appeal, beadboard and wainscoting provide an additional layer of protection to your walls in terms of scratches, dents, and other damage.
- Washable Paint. Once you’ve installed a wall material, don’t underestimate the power of a good coat of paint. Washable paint not only adds vibrancy to your basement but also serves as an extra layer of defense against dampness. Accidental spills or moisture-induced stains? No problem — a simple wash will do the trick.
Before deciding, assess the specific conditions of your basement and consult with professionals if needed. Combining moisture-resistant wall materials with proper ventilation and waterproofing measures can help create a more resilient and durable basement space.
7 Ideas for Finishing Your Basement Ceiling
When finishing your basement, the floors and walls are often the first to get sorted, leaving your basement ceiling last on your to-do list. To finish the job — no pun intended — consider one of these options for your basement ceiling:
- Painted drywall offers a safe and consistent look for your basement, especially if you choose to install it on both your walls and ceilings. However, be mindful of its messy installation and limited accessibility to your mechanical systems.
- PVC panels like Trusscore Wall&CeilingBoard can be installed on walls and ceilings alike as the name suggests. In addition to its durability, moisture-resistant, and easy to clean properties, the panels are also 40% lighter than drywall so they’re easy to install overhead.
- Beadboard can be installed on the ceiling in addition to your walls for a trendy and budget-friendly finished. The panels are available in multiple colors with a pre-finished surface and have an easy tongue-and-groove installation.
- Shiplap is durable, visually interesting, and cost-effective. Shiplap panels are also easy to install and give you the option to incorporate hidden access panels for ceiling systems.
- Drop ceiling tiles are a classic option that are perfect for high-ceiling basements, providing reliable access to plumbing and electrical systems with options for additional soundproofing and fire resistance.
- Decorative ceiling tiles can elevate your basement with an elegant and intricate design that uses the same system as drop ceilings.
- Paint your joists black for a budget-friendly finish that looks modern and clean and disguises plumbing, electrical, and mechanical systems while creating the illusion of a larger space.
For more sustainable basement ceiling ideas, read this blog post.
10 Lighting Options to Consider Installing to Finish Your Basement
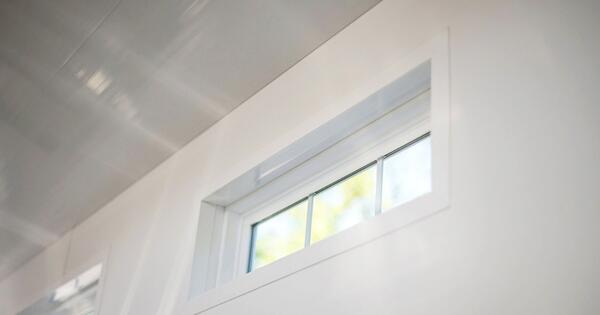
Limited natural light in a basement can make the space feel dark and unwelcoming. However, with strategic lighting choices, you can brighten up the area and create a more inviting atmosphere. Here are some options to consider for a basement with few windows:
- Layered lighting involves using multiple light sources at different levels to create a balanced and visually appealing illumination in a space. As part of your layered lighting strategy, use desk lamps, floor lamps, and under-cabinet lighting as task lighting for specific activities, like reading, crafting, or working.
- Recessed lighting refers to fixtures installed into the ceiling, providing a streamlined and unobtrusive light source that is often used for general or accent lighting. When installing recessed lighting, make sure to space the lights evenly across the ceiling, focusing on areas where you need the most light.
- Track lighting uses a linear track system to mount and move individual light fixtures, allowing you to direct light in different directions.
- Floor and table lamps are portable and flexible lighting options that add warmth to the space. Be sure to position floor and table lamps near seating areas, reading nooks, or task areas.
- Wall sconces save floor and table space while providing decorative and ambient lighting. To create visual interest and avoid shadows, install wall sconces at various heights.
- Under-cabinet lighting like LED strips or puck lights easily install with adhesive or screws and help to illuminate work surfaces like countertops or desks.
- Mirrors and reflective surfaces can enhance the natural and artificial light in a room when placed strategically. Position mirrors across from light sources to get the best effect.
- Light-colored walls and furniture also play an important role in your basement lighting strategy because they maximize the reflection of available light. On the walls specifically, choose glossy or semi-gloss panels or paint finishes to further increase the reflectivity of your space.
- Natural-looking bulbs, or light bulbs with a color temperature that resembles natural daylight, can help create a more inviting atmosphere in your basement. If you’re using LEDs, choose bulbs with a color temperature of 5000K for a daylight-like glow.
- Dimmer switches allow you to adjust the brightness of the lights in your basement to suit different activities and moods. Install dimmer switches for overhead lights, sconces, or other fixtures.
By combining these lighting strategies, you can create a well-lit and inviting basement space, even without many windows. Experiment with different types of lighting to find the right balance that suits your preferences and enhances the functionality of the area.
With your floor, walls, and ceilings covered and your lighting installed, you can start adding finishing touches to your finished basement. The key is to create a space that feels comfortable, reflects your personality, and serves the intended functions. Don't be afraid to mix and match styles, incorporate DIY projects, and let your creativity shine.
![How Much Does It Cost to Finish a Basement in 2026? [Complete Pricing Guide]](/content/images/cache/blog/cost-basement/basic-land.aae4a3cd.png)