This post was originally published November 2024. Last updated: January 2026.
Moisture is one of the most common causes of long-term damage in homes and commercial buildings. Water that slips behind walls, under flooring, or into structural materials can lead to mold growth, rot, corrosion, and costly repairs. Waterproof sealants play a critical role in preventing these problems by creating a flexible barrier that keeps moisture where it belongs.
Whether you’re a homeowner tackling a bathroom refresh, a DIYer sealing a basement wall, or a contractor working on a high-use commercial space, selecting the right waterproof sealant matters. This guide explains how waterproof sealants work, compares the most common types, and walks through how to apply them correctly so you can make a confident, informed decision.
What Is a Waterproof Sealant?
A waterproof sealant is a flexible material designed to fill joints, cracks, and gaps to prevent water penetration. Unlike rigid fillers or adhesives, sealants are engineered to expand and contract with building materials as temperatures change or structures shift. This flexibility helps maintain a watertight seal over time rather than cracking or pulling away from the surface.
Waterproof sealants are commonly used in bathrooms, kitchens, basements, exterior walls, and around windows and doors. In each of these areas, they act as a protective barrier that reduces moisture-related damage and extends the lifespan of surrounding materials.
Understanding the Main Types of Waterproof Sealant
Not all waterproof sealants perform the same way. Each type is formulated to handle different levels of moisture exposure, surface movement, and finishing requirements. Understanding these differences helps narrow down the right product before you ever step into the store.
Silicone Sealant
A silicone sealant is a highly flexible, waterproof sealant designed for wet or humid environments. It resists mold growth, UV exposure, and temperature changes, but it cannot be painted once cured.
Silicone sealants are widely used in bathrooms, kitchens, and other areas that experience frequent or direct water exposure. Because silicone remains flexible for decades, it performs well in joints that move slightly over time, such as corners, seams, and transitions between materials.
Polyurethane Sealant
A polyurethane sealant is a durable, paintable sealant that provides strong adhesion and long-term waterproofing across a wide range of materials.
Polyurethane sealants bond aggressively to porous surfaces like concrete, wood, and masonry. They offer excellent durability and can be painted once cured, which makes them a popular choice for exterior applications or areas where appearance matters.
Acrylic Sealant
Acrylic sealants are water-based products commonly used for interior applications with minimal moisture exposure. They are easy to apply, clean up with water, and can be painted quickly, but they offer lower flexibility and waterproofing performance compared to silicone or polyurethane.
Factors to Consider When Choosing a Waterproof Sealant
Selecting the right waterproof sealant isn’t just about picking a brand off the shelf — it’s about matching the product to your surface, environment, and project needs. Keeping these factors in mind will help you avoid costly mistakes and ensure a long-lasting seal.
- Surface Type: Different sealants work best on different materials. For example, silicone adheres well to glass, tile, and metal, polyurethane bonds strongly to concrete and wood, and acrylic works well on drywall or trim. Choosing the wrong sealant for your surface can result in poor adhesion or premature failure.
- Joint Movement and Flexibility: Some areas expand, contract, or shift with temperature changes or settling. Flexible sealants like silicone and polyurethane can move with the joint without cracking, while acrylic is better suited for low-movement areas.
- Paintability: If the sealed area will be painted, avoid 100% silicone, which cannot be painted. Polyurethane and acrylic sealants can be painted once fully cured.
- Exposure Conditions: Consider where the sealant will be used. Outdoor areas or surfaces exposed to UV, rain, or freezing temperatures need durable, weather-resistant sealants like silicone or polyurethane. Interior, low-moisture areas can often be sealed effectively with acrylic.
- Ease of Application: Some sealants are easier to apply, smooth, and clean up than others. Acrylic and silicone are generally easier for beginners, while polyurethane may require more careful handling and tooling.
Silicone vs Polyurethane vs Acrylic: Sealant Comparison Table
| Feature | Silicone | Polyurethane | Acrylic |
|---|---|---|---|
| Waterproofing Capability | Silicone provides excellent waterproofing, even in areas with standing water. | Polyurethane provides excellent waterproofing and resists long-term moisture exposure. | Acrylic provides moderate waterproofing and is best for low-moisture areas. |
| Flexibility | Silicone remains highly flexible over time. | Polyurethane offers high flexibility with strong adhesion. | Acrylic offers limited flexibility and may crack in moving joints. |
| Typical Lifespan | Silicone commonly lasts 15–25 years. | Polyurethane typically lasts 10–20 years. | Acrylic generally lasts 3–7 years. |
| Paintability | Silicone cannot be painted. | Polyurethane can be painted after curing. | Acrylic is paintable shortly after application. |
| UV Resistance | Silicone resists UV exposure extremely well. | Polyurethane offers good UV resistance. | Acrylic has limited UV resistance. |
| Compatible Surfaces | Silicone works well on tile, glass, metal, and PVC. | Polyurethane bonds well to concrete, wood, and metal. | Acrylic is best for drywall, trim, and masonry. |
| Best Use Cases | Silicone is best for bathrooms, showers, and kitchens. | Polyurethane is best for exterior joints and concrete. | Acrylic is best for interior trim and low-movement joints. |
Quick Sealant Selection Guide
For homeowners who just want a practical recommendation, here’s a simple guide based on common project areas:
- Bathrooms and Showers: Use 100% silicone sealant. It remains flexible in wet conditions, resists mold and mildew, and provides long-lasting waterproof protection.
- Kitchens and Sink Areas: Silicone works well for moisture-prone areas. Use polyurethane if the joint will be painted.
- Concrete Surfaces and Basement Walls: Use polyurethane sealant. It bonds strongly to concrete, accommodates movement, and can be painted if desired.
- Interior Trim and Low-Moisture Areas: Acrylic sealant is sufficient. It’s easy to apply, paintable, and suitable for low-stress joints.
Following these guidelines ensures that you choose a sealant that matches the demands of your project, prevents water damage, and avoids unnecessary maintenance or rework down the line.
When to Use Waterproof Sealants
Waterproof sealants should be used anywhere moisture could compromise building materials or finishes. Recognizing these situations helps prevent damage before it starts.
Common scenarios where waterproof sealants are necessary include:
- Sealing cracks and gaps: Using a waterproof sealant helps prevent water from entering cracks in walls, floors, or countertops, which can lead to deterioration over time.
- Outdoor projects: Applying sealant to decks, patios, fences, and exterior siding protects surfaces from rain, snow, and UV exposure.
- Bathrooms and kitchens: Sealing joints around sinks, showers, tubs, and countertops prevents water from leaking into wall cavities and cabinets.
- Basement waterproofing: Sealing basement walls and floors helps limit moisture intrusion and reduces the risk of mold or mildew.
- Window and door frames: Sealing around openings prevents drafts, water intrusion, and energy loss.


Application-Specific Waterproof Sealant Recommendations
Choosing a sealant based on the environment is just as important as choosing based on material. Different rooms and surfaces place different demands on a sealant.
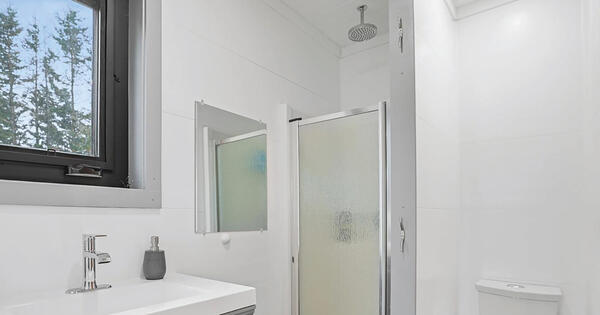
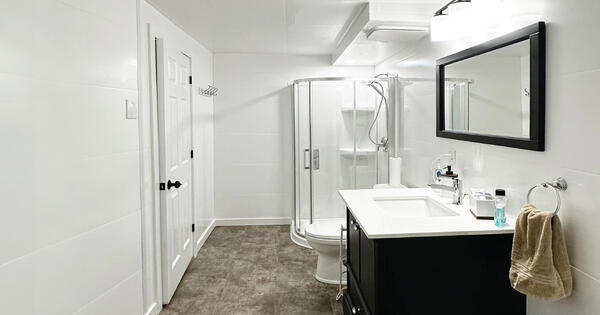
Waterproof Sealant for Bathrooms
Bathrooms are high-moisture environments with frequent temperature changes and direct water exposure. Silicone sealant performs best in these conditions because it remains flexible, resists mold growth, and does not degrade when exposed to water over long periods.
Waterproof Sealant for Kitchens
Kitchens experience intermittent moisture along with movement from appliances and cabinetry. Silicone sealant works well around sinks and backsplashes, while polyurethane sealant is better suited for areas that require paintability, such as trim or wall transitions.
Waterproof Sealant for Concrete and Basement Walls
Concrete surfaces expand, contract, and absorb moisture. Polyurethane sealant adheres strongly to concrete and accommodates movement, making it well suited for basement walls, foundation cracks, and concrete joints.
Waterproof Sealant for Interior Trim
Interior trim areas typically experience minimal moisture and movement. Acrylic sealant is often sufficient in these applications because it’s easy to apply, paintable, and appropriate for low-stress joints.
How to Apply Waterproof Sealant: Step-by-Step Guide
Proper application is essential for achieving a durable, watertight seal. Even a high-quality product can fail if it’s applied incorrectly.
Step 1: Surface Preparation
Before applying sealant, the surface should be thoroughly cleaned to remove dirt, dust, grease, and old sealant. Any cracks or voids should be repaired, and the surface must be completely dry to ensure proper adhesion.
Step 2: Tools You Will Need
Having the correct tools on hand helps ensure a clean and consistent application:
- A caulking gun allows for controlled and even application of sealant.
- A utility knife or scissors is needed to cut the nozzle at the correct angle.
- Painter’s tape helps create clean edges along visible seams.
- Gloves and safety glasses provide basic protection during application.
Step 3: Applying the Sealant
The nozzle should be cut at a 45-degree angle and sized to match the joint width. Apply steady pressure to the caulking gun while moving consistently along the joint to create a continuous bead without gaps or stops.
Step 4: Smoothing the Bead
Smoothing the bead immediately after application improves adhesion and appearance. A damp finger or smoothing tool can be used to press the sealant into the joint and remove excess material.
Step 5: Curing Time
Sealant must be allowed to cure fully before exposure to moisture. Curing times vary by product and conditions, so manufacturer instructions should always be followed.
Common Mistakes to Avoid When Installing Waterproof Sealant
Understanding common mistakes helps avoid premature failure and rework.
- Skipping surface preparation often leads to poor adhesion and early sealant failure.
- Using the wrong sealant type for the environment can result in cracking, peeling, or mold growth.
- Applying sealant in extreme temperatures can interfere with curing and adhesion.
- Using too little sealant may leave gaps that allow water intrusion.
- Painting over non-paintable sealants such as silicone leads to peeling and poor appearance.
Choosing the Right Sealant Type
Focusing on how a joint will perform over time helps narrow down the correct sealant choice.
- Silicone sealant is best for high-moisture, non-paintable areas such as showers and sink surrounds.
- Polyurethane sealant is best for paintable or exterior applications where durability and adhesion matter.
- Acrylic sealant is best for interior trim and low-movement joints where moisture exposure is limited.
Choosing Waterproof Sealants for Trusscore Projects
When installing Trusscore Wall&CeilingBoard in high-moisture areas of your home, such as a flood-prone basement or a shower enclosure, proper sealant application is critical to achieving a watertight installation.
If you’re using Trusscore Wall&CeilingBoard in these environments, apply a continuous bead of silicone sealant inside the grooved end of each panel and along the entire length of each Trusscore trim piece. This approach helps prevent moisture from migrating behind the panels and protects the underlying wall structure from water damage. The bead of silicone should be controlled and consistent so it fully fills the groove without creating excess buildup. It should be no thicker than a string of yarn.
Silicone sealant should also be applied at all inside and outside corners, around plumbing fixtures, and anywhere panels terminate against another surface. To ensure drainage, drill 1/4" diameter holes into the bottom of the Snap-In J Trim after installing it on the bottom of the wall. The Snap-In J Trim must be fully assembled before drilling holes. Holes should be placed 16" apart.
Any high-quality kitchen and bath silicone sealant will work for Trusscore installations. However, we often recommend DAP Silicone Ultra Kitchen, Bath & Plumbing Sealant for projects in Canada, or DAP Commercial Kitchen 100% Silicone Sealant for projects in the United States, based on availability and performance in wet environments.
Because sealant colors and finishes can vary by brand and region, it’s best to compare a physical Trusscore sample to the silicone tube in-store to select the closest color match.
How to Maintain Waterproof Sealant
Waterproof sealants require periodic maintenance to remain effective over time.
- Regular inspections help identify cracking, separation, or wear before moisture damage occurs.
- Cleaning sealed areas with mild soap and water removes buildup without degrading the sealant.
- Reapplying sealant every three to five years helps maintain protection, depending on the environment.
- Avoiding harsh chemicals and extreme conditions helps extend the life of the sealant.
Frequently Asked Questions About Waterproof Sealants
What is the best waterproof sealant for bathrooms?
A 100% silicone sealant offers the best moisture resistance and flexibility for bathroom environments.
Can you paint over silicone sealant?
Silicone sealant cannot be painted, as paint will not adhere to its surface.
What is the difference between silicone and polyurethane sealant?
Silicone excels in wet environments, while polyurethane offers paintability and strong adhesion to porous surfaces.
How long does waterproof sealant last?
Depending on type and conditions, waterproof sealants typically last between 3 and 25 years.
Is 100% silicone better than siliconized acrylic?
For wet areas, 100% silicone performs better than siliconized acrylic in terms of durability and moisture resistance.
What surfaces can waterproof sealant be used on?
Waterproof sealants can be used on tile, glass, concrete, wood, metal, PVC, drywall, and masonry, depending on the product.
Choosing the right waterproof sealant comes down to matching the product to the surface, the environment, and how much movement or moisture the area will see over time. Silicone, polyurethane, and acrylic sealants each serve a different purpose, and understanding those differences helps prevent common issues like cracking, peeling, mold growth, and water intrusion. By considering factors such as moisture exposure, paintability, and joint movement—and by applying the sealant correctly—you can create a durable, long-lasting seal that protects your home and reduces the need for future repairs.