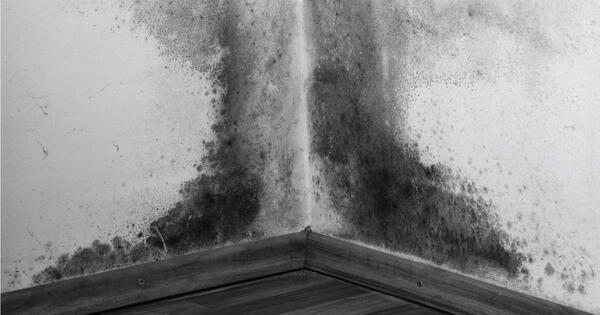
Basement water damage is one of the most expensive and disruptive problems a homeowner can face. What starts as a damp corner or a thin white crust on a concrete block wall can escalate quickly into structural damage, mold colonies, and a finished space that has to be gutted and rebuilt from scratch. The cost of ignoring early moisture signals is almost always far greater than the cost of addressing them.
There's also the question of home value. A properly waterproofed and finished basement adds real square footage. A wet, musty basement does the opposite. Buyers and home inspectors know what to look for, and visible staining, efflorescence, or peeling paint on basement walls raises immediate red flags during a sale. Waterproofing basement walls isn't just maintenance. It's an investment in the structure, livability, and long-term value of your home.
What Causes Water Damage in Basements
Before you can fix a wet basement, you need to understand where the water is coming from. There's no single cause of basement moisture, and the right solution depends entirely on the source. Applying the wrong fix — painting over a crack that needs to be injected, for example — will waste money and leave the underlying problem untouched.
The most common causes of basement water damage include:
- Poor grading around the foundation. When the ground slopes toward the house instead of away from it, rainwater and snowmelt drain directly against the foundation wall. This is one of the most common and most overlooked contributors to basement moisture problems.
- Clogged or absent gutters and downspouts. Gutters that overflow dump large volumes of water right at the base of the foundation. Downspouts that terminate too close to the house make it worse. Water that has nowhere to go follows the path of least resistance, and often that path leads through your foundation wall.
- Cracks in the foundation wall or floor. Concrete isn't waterproof by default, and over time, settling, freeze-thaw cycles, and shrinkage create cracks. Even hairline cracks can allow water to migrate through under pressure.
- Window well flooding. Basement windows sit below grade, and if window wells aren't draining properly or are filled with debris, they can accumulate water and push it directly through the window frame into the basement.
- Interior condensation. This is often mistaken for a seepage problem but is fundamentally different. Warm, humid interior air hits the cool concrete wall and moisture condenses on the surface. It looks like the wall is sweating, but the water is coming from the air inside, not through the wall.
- Failed waterproofing on an older home. Many homes built before the 1980s have little to no waterproofing on the exterior of the foundation. Whatever protection was applied decades ago has likely degraded, and the wall is now vulnerable to any sustained moisture load.
The Role of Hydrostatic Pressure
Hydrostatic pressure is the force that water exerts against your foundation when the surrounding soil is saturated. When it rains heavily or when snow melts rapidly, the water table around your home can rise. Saturated soil holds water against your foundation wall under pressure, and that water will find any available path through:
- Pores in the concrete
- Existing cracks
- The joint where the wall meets the footing
- Mortar joints in block walls
This is why surface sealants and paints alone aren't sufficient for serious water intrusion. A sealant applied to the interior face of a wall is working against the pressure, not with it. Managing hydrostatic pressure requires one or more of the following:
- Relieving it from the exterior by improving drainage and grading
- Intercepting it before it reaches the wall with an interior drainage system
- A combination of both approaches
Climate patterns have made this more urgent. Increasingly intense rainfall events concentrated over shorter windows are generating runoff faster than soil can absorb it, creating temporary spikes in hydrostatic pressure that older drainage systems weren't designed to handle. If your basement moisture problems have gotten worse in recent years without any obvious change to the house itself, shifting precipitation intensity is likely a contributing factor.
How to Diagnose Where Basement Moisture Is Coming From
The first step in solving a basement moisture problem is confirming whether water is coming through the wall from outside or condensing on the wall surface from inside. These two problems look nearly identical but require completely different solutions. Skipping this diagnostic step is a common and expensive mistake.
The Foil Test
The foil test is the most reliable low-tech method for determining whether you're dealing with seepage or condensation. Here's how to do it:
- Cut a piece of aluminum foil roughly 12 inches square.
- Tape all four edges tightly to the basement wall using waterproof tape, with no gaps at the edges.
- Leave it in place for 24 to 48 hours, then pull it off and examine both sides.
Interpreting your results:
- Back of foil is wet (side against the wall): Water is migrating through the wall from outside. That's a seepage problem requiring waterproofing solutions — interior drainage, exterior membrane work, or crack repair, depending on severity.
- Front of foil is wet, back is dry (side facing the room): Moisture is condensing from interior air. Improving ventilation or running a dehumidifier may resolve the issue without any structural waterproofing work.
- Both sides are wet: You're likely dealing with both problems simultaneously.
Using a Moisture Meter
A moisture meter gives you a more precise and quantitative read on wall conditions. These tools are inexpensive, widely available, and allow you to probe multiple points across the wall to map moisture levels systematically. A pin-type meter works best on porous masonry — press the pins into the surface and get a reading that reflects how much moisture is present in the material itself, not just on the surface.
When scanning the basement perimeter, pay close attention to:
- The base of all walls
- Corners
- The wall-floor joint
- Areas adjacent to window wells
A cluster of high readings along one wall may indicate a drainage problem on that side of the house. Readings that are elevated near the floor but not higher up suggest the issue is at the footing joint rather than through the wall face itself. This kind of spatial mapping is far more actionable than a single spot check.
Interior vs. Exterior Basement Waterproofing Methods
Once you've identified where moisture is entering, you need to choose a waterproofing strategy. Basement waterproofing methods fall into two broad categories: interior approaches that manage water after it enters the foundation structure, and exterior approaches that prevent water from reaching the foundation in the first place. Both have legitimate uses, and in some cases the right solution is a combination.
Interior Sealants
Interior masonry sealants are applied directly to the inside face of concrete or block walls. Common product types include:
- Hydraulic cement: Best for plugging active leaks and cracks where water is visibly seeping. Expands slightly as it cures to create a tight seal.
- Crystalline waterproofing compounds: Penetrate deeper into the masonry and form insoluble crystals within the concrete matrix that block water movement over time.
Interior sealants are a legitimate first line of defense for minor seepage and surface dampness. They're inexpensive, accessible to most DIYers, and effective when moisture levels are low. Their limitation is that they're working against hydrostatic pressure from the outside. For walls under significant water load, sealants alone won't hold indefinitely. Use them as part of a broader strategy, not as a standalone fix for serious water intrusion.
Crack Injection
Cracks in poured concrete walls are best addressed with epoxy or polyurethane foam injection, which seals the crack through its full thickness rather than just the visible surface. Here's how the two options compare:
- Epoxy injection: Restores structural integrity and creates a rigid, bonded repair. Best for stable cracks that are no longer moving.
- Polyurethane foam injection: More flexible, better suited for cracks that may still be moving slightly due to settling or thermal cycling.
Crack injection kits are available for DIY use, but quality depends heavily on proper surface preparation and consistent injection pressure throughout the crack's length. For cracks longer than about 12 inches, or any crack showing evidence of active water flow, professional injection is usually worth the investment. An improperly injected crack can look sealed at the surface while leaving voids inside the wall that continue to allow water migration.
Interior French Drain and Drain Tile System
An interior drainage system — commonly called a French drain or interior drain tile — is the most comprehensive interior waterproofing method. The installation process works as follows:
- A trench is cut along the perimeter of the basement floor at the base of the wall.
- A perforated pipe is laid in the trench and surrounded by gravel.
- The trench is covered with new concrete.
- The pipe channels water that seeps through the wall down to a sump pit for removal.
This approach doesn't stop water from entering the wall structure — it intercepts and removes it before it can damage the interior. It's particularly effective when combined with a properly sized sump pump system. Interior French drain installation is disruptive and isn't a realistic DIY project for most homeowners, but it's the most reliable long-term solution for basements with persistent, moderate-to-heavy seepage.
Sump Pump Upgrades
If your basement already has a sump pit and pump, evaluate whether the system is adequate for the water volume your home experiences during heavy storms. Signs it may be time to upgrade:
- The pump runs continuously during rain events
- The pump is more than 10 years old
- There's no battery backup unit installed
- The housing is plastic rather than cast iron or stainless steel
Upgrading to a higher-capacity primary pump, adding a battery backup unit, and installing a water alarm in the sump pit are all worthwhile steps. A pump that fails during a storm that simultaneously knocks out power is the worst-case scenario for any basement waterproofing system.
Exterior Excavation and Membrane Application
Exterior waterproofing addresses the problem at its source rather than managing water that has already entered the wall. The process involves:
- Excavating the soil around the foundation down to the footing
- Cleaning the exterior wall surface thoroughly
- Applying a waterproof membrane or coating to the outside face of the foundation
- Installing a drainage board over the membrane to channel water down to a perforated pipe at the footing
- The pipe carries water away from the structure and into a drainage outlet
Exterior waterproofing is most appropriate for:
- New construction
- Homes with significant exterior foundation defects
- Situations where interior methods have already been tried and failed
The main barriers are cost and disruption. Excavation requires heavy equipment, can affect landscaping, decks, or driveways, and takes time to restore.
Exterior Grading and Drainage Corrections
If the soil around your foundation slopes toward the house, regrading is one of the highest-value and most cost-effective corrections you can make. The ground within the first six feet of the foundation should slope away from the house at a rate of at least one inch per foot.
Key grading and drainage corrections to consider:
- Add topsoil along the foundation perimeter to achieve proper slope
- Remove mulch or landscaping that traps water against the foundation
- Install surface swales to redirect runoff away from the house
- Check that window wells have proper drainage gravel at the base
Regrading is a reasonable DIY project for many homeowners and delivers outsized results relative to its cost.
Downspout Extensions
Downspout extensions are inexpensive and highly effective. Standard downspouts terminate just a few inches from the foundation, directing concentrated roof runoff directly against the foundation wall. Best practices for downspout management include:
- Extend all downspouts a minimum of four to six feet from the foundation
- Consider underground drainage pipes that discharge further from the house
- Use flexible corrugated extensions as an easy and affordable starting point
- Check and clean all downspout connections at least twice a year to prevent overflow
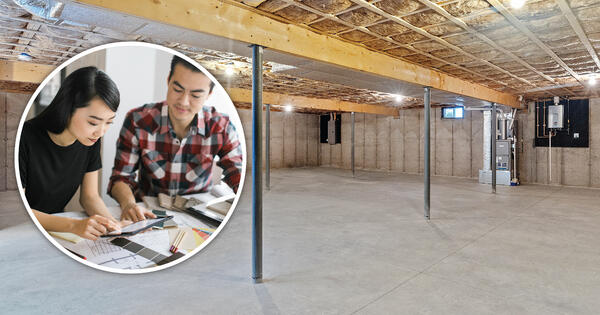
When to Hire a Professional
DIY waterproofing is appropriate for minor issues, maintenance corrections, and low-pressure seepage. The following situations call for a licensed waterproofing contractor:
- Water is entering in volume through multiple points
- There's evidence of structural cracking or foundation movement
- Mold is already established
- Previous DIY attempts haven't resolved the problem
Get at least three quotes, ask for references, and look for contractors who will diagnose the source of the problem rather than defaulting immediately to the most expensive solution.
Cost Breakdown of Basement Waterproofing Methods
Waterproofing costs vary significantly depending on the severity of the moisture problem, basement square footage, and the methods required. The following ranges reflect typical costs in the U.S. and Canada as of 2025 and should be used as planning estimates rather than fixed quotes.
| Method | Typical Cost Range |
|---|---|
| DIY interior sealant application | $100 to $500 (materials only) |
| Professional crack injection | $300 to $800 per crack |
| Interior French drain + sump pump | $5,000 to $15,000 installed |
| Sump pump replacement or upgrade | $500 to $1,500 installed |
| Exterior membrane excavation | $10,000 to $30,000+ |
| Professional full-system solution | $15,000 to $40,000+ |
In almost every case, addressing the moisture problem before finishing the space is the right financial decision. Completing a basement renovation with drywall and then experiencing a water event that requires full demolition and remediation is a far more expensive outcome than waterproofing first and finishing second.
Best Materials for Protecting Basement Walls After Waterproofing
Waterproofing the foundation is only half the equation. The material you use to finish the interior of your basement walls determines how well the space holds up over time, including during any future moisture events. Choosing the wrong finishing material can undo expensive waterproofing work and force a costly redo.
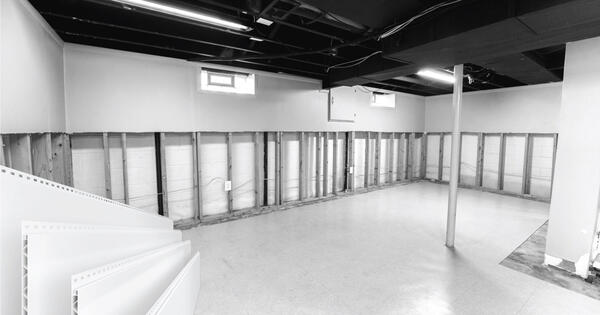
Drywall: Why It's a Poor Choice for Basements
Standard drywall is made from gypsum — a material that absorbs water readily and provides an ideal growth medium for mold. Even moisture-resistant drywall is designed to tolerate incidental splashes, not sustained moisture exposure. When drywall gets wet in a basement environment, the consequences are predictable:
- It warps, sags, and the paper facing delaminates
- Mold can establish itself within 24 to 48 hours of sustained moisture contact
- The wall surface may look fine while mold grows invisibly behind it
- Full wall demolition, mold remediation, and refinishing are typically required after any significant water event
If you're investing in a basement waterproofing project and finishing with standard drywall, you're reducing your margin of error to nearly zero. For a thorough breakdown of the differences, this comparison of Trusscore Wall&CeilingBoard vs. drywall covers the key points in detail.
How PVC Wall Panels Help Prevent Future Basement Water Damage
Even after thorough waterproofing, basements remain environments where moisture risk is elevated compared to above-grade living spaces. Finishing basement walls with a material that can handle that ongoing exposure — and survive the occasional moisture event without requiring replacement — is a logical extension of the waterproofing investment.
Trusscore Wall&CeilingBoard is a PVC wall and ceiling panel designed specifically for environments where moisture and water resistance are non-negotiable. The performance advantages over drywall are significant:
- Won't absorb water under any conditions — no swelling, no sagging, no rot
- Doesn't support mold growth structurally, not just through a surface treatment
- Survives moisture events intact — dry out the space and the panels require no replacement
- Cleanable and scrubbable — retains appearance over years without painting or refinishing
- Can be installed as wainscoting — if you only need coverage on the bottom half of your wall, you can combine Trusscore with drywall for added protection
- Removable and reinstallable — individual panels can be taken off to access the wall behind them, inspect for moisture, or re-apply sealant, then put back without destroying the finish
That last point matters more than it might seem. Drywall-finished basements that experience a water event typically require partial or complete wall demolition, mold remediation, insulation replacement, and full refinishing. With PVC panels, the response to a moisture event is often as simple as wiping down the surface and addressing the source. In a basement where the underlying foundation remains subject to moisture variation over time, being able to access the wall without a full demolition is a genuine and lasting benefit.
Trusscore also offers SlatWall panels that work alongside Wall&CeilingBoard to create organized, functional storage walls in basements and utility areas — all using the same moisture-resistant PVC material. You can see the full range of basement-specific applications at Trusscore's basement applications page.
For anyone planning a basement renovation after completing waterproofing, this guide to starting a basement renovation the right way provides a solid framework for sequencing the work and making smart material decisions. And if you're still weighing wall material options, this article on why drywall isn't the right answer for basement renovations lays out the case in detail.
Comparing Basement Wall Finish Materials
Here's how the most common options stack up:
| Material | Moisture Resistance | Mold Risk | Recoverable After Leak | Best Use Case |
|---|---|---|---|---|
| Standard drywall | Low | High | No | Not recommended below grade |
| Moisture-resistant drywall | Moderate | Moderate | No | Minor improvement, still not ideal |
| Cement board | High | Low | Yes | Utility/storage areas |
| Fiberglass-faced gypsum | Moderate | Moderate | No | Marginal improvement over standard |
| PVC wall panels | Very high | Very low | Yes | Finished basement living spaces |
For finished basement living spaces, PVC panels are the most water-resistant option available. They contain no organic material, won't absorb moisture under any conditions, and resist mold growth at a structural level rather than through chemical treatment that degrades over time. The moisture and water resistance built into Trusscore panels is inherent to the material itself.
Frequently Asked Questions About Waterproofing Basement Walls
Can you waterproof basement walls from the inside only?
Yes, in many cases interior-only basement waterproofing is both practical and effective. Interior methods like sealants, crack injection, and interior French drain systems with sump pumps are what most homeowners and contractors rely on in existing homes. Full exterior excavation is expensive, disruptive, and not always possible depending on lot size, landscaping, or foundation access.
That said, interior methods work best when combined with good exterior drainage practices:
- Proper grading away from the foundation
- Maintained gutters with no overflow
- Downspouts extended at least four to six feet from the house
Address the exterior factors first, and then evaluate whether interior waterproofing is still needed.
What is the best material for basement walls after waterproofing?
For finished basement living spaces, PVC wall panels are the best choice after waterproofing. They're completely moisture-resistant, don't support mold growth, and don't require replacement if the basement experiences occasional water exposure.
Other options by use case:
- Utility and storage spaces: Cement board or epoxy-coated concrete block
- Finished living spaces: PVC panels (strongly preferred over any drywall product)
- Not recommended below grade: Standard drywall or moisture-resistant drywall variants
How much does it cost to waterproof a basement?
Costs vary widely based on the extent of the problem and the methods required. See the cost table in the section above for a full breakdown. The most important factor is addressing contributing causes — grading, gutters, downspouts — before committing to major interior or exterior waterproofing work. Doing that first often reduces the scope and cost of what's actually needed.
How long does basement waterproofing last?
Longevity depends heavily on the method used and the quality of installation:
- Interior sealants: 5 to 10 years before reapplication may be needed
- Crack injections: Can last the life of the structure when properly done
- Interior French drain systems: Commonly warrantied for 10 to 25 years; well-maintained systems often outlast those warranties
- Exterior membrane systems: 20 to 30 years or more, depending on membrane type and backfill conditions
In all cases, maintaining good drainage, gutters, and grading extends the effective life of any waterproofing system by reducing the ongoing water load it has to manage.
Protecting your basement walls from water damage isn’t about a single product or quick fix — it’s about understanding where moisture is coming from and choosing solutions that match the problem. When you diagnose correctly, improve exterior drainage, apply the right interior or exterior waterproofing methods, and finish the space with materials that can withstand future moisture, you create a basement that stays dry, healthy, and reliable for the long haul. Investing in proper waterproofing before you build out the space saves money, preserves home value, and ensures that any renovation you do is built on a solid, resilient foundation.
Basement Products You Can Rely On

Wall&CeilingBoard
Trusscore Wall&CeilingBoard is an interlocking, interior PVC wall and ceiling panel that is lightweight, low maintenance, and outperforms alternative products like drywall and FRP.
Learn More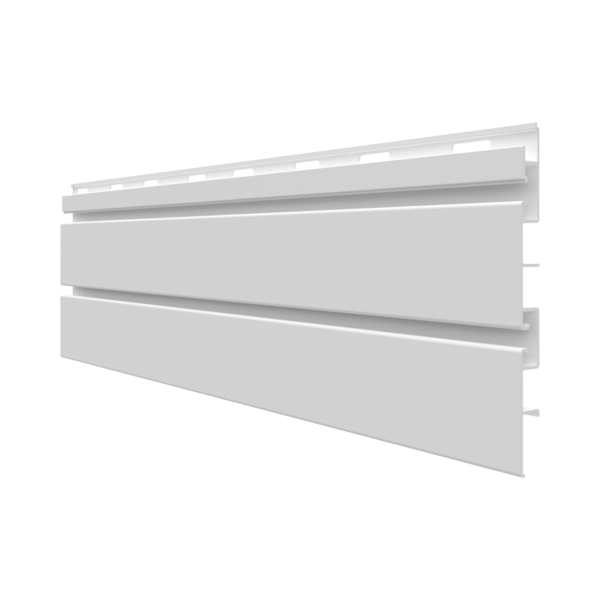
SlatWall
Trusscore SlatWall is a high-strength, on-the-wall organization system that’s easy to install and seamlessly integrates with Trusscore Wall&CeilingBoard.
Learn More