This post was originally published in May 2025. Last updated: July 2026.
Most studs are spaced 16 inches apart on center, though some walls use 24 inches on center instead. That’s the short answer to how far apart are studs, but the full answer depends on the wall you’re looking at. Interior partition walls, exterior walls, garages, basements, and mobile homes don’t always follow the same rule, and older homes can be different still.
Knowing your stud spacing before you start a project isn’t optional if you want the work to hold up. Drywall, wall panels, shelving, cabinets, and anything else you fasten to a wall needs to land on solid framing, not just whatever surface material happens to be covering it. Get the spacing wrong and you risk sagging shelves, wobbly cabinets, or wall panels that don’t line up the way they should. This guide covers standard stud spacing, how it changes by building type, how to measure it accurately, how to find a stud with or without a stud finder, and what stud spacing means for installing wall panels like Trusscore Wall&CeilingBoard.
How Far Apart Are Studs?
In most residential construction, studs sit at one of two standard distances, and knowing which one you’re dealing with tells you a lot about how a wall was built and what it can support. The distance between wall studs falls into two main categories: 16 inches on center and 24 inches on center. “On center,” often written as OC, means the measurement runs from the center of one stud to the center of the next, not from edge to edge. A third spacing, 19.2 inches on center, shows up occasionally in engineered framing, but it’s uncommon enough that you likely won’t run into it in a typical home.
16" vs 24" on center
Both spacing standards show up throughout residential and commercial construction, but they’re suited to different jobs. The table below compares how they stack up.
| Feature | 16" On Center | 24" On Center |
|---|---|---|
| Typical Applications | Interior walls, load-bearing walls, most residential framing | Exterior walls, energy-efficient builds, some garages and basements |
| Structural Strength | Higher load capacity, more support points for heavy fixtures | Lower load capacity, more flex under weight |
| Material Efficiency | Uses more lumber and fasteners | Uses fewer studs, more cost-efficient, more room for insulation |
| Common Building Types | Standard residential homes, older construction, interior mobile home walls | Newer energy-efficient homes, garages, unfinished basements |
Neither spacing is inherently better than the other. Sixteen inches on center gives you more attachment points and higher load capacity, which is why it’s the default for load-bearing walls and anywhere you plan to hang something heavy. Twenty-four inches on center trades some of that strength for material efficiency and, in exterior walls, more room for insulation, which is why builders lean on it for energy-efficient framing and certain garage or basement walls.
Standard Stud Spacing by Building Type
Stud spacing isn’t fixed across every structure. Building type, age, and purpose all influence how a wall was framed, so the spacing behind the drywall in a 1920s farmhouse can look nothing like what you’ll find in a new-build garage. The table below summarizes typical stud spacing across common building types, and the sections that follow dig into the details.
| Building Type | Typical Stud Spacing | Notes |
|---|---|---|
| Standard Residential Homes | 16" OC | Most common spacing in modern builds |
| Newer / Energy-Efficient Homes | 24" OC | Reduces lumber use, increases insulation space |
| Garages | 16" or 24" OC | Exterior walls often 24" OC, interior dividing walls typically 16" OC |
| Basements | 24" OC common | Especially in unfinished or partially finished spaces |
| Mobile Homes | 16" or 24" OC | Depends on the manufacturer, interior walls may be 24" OC |
| Older Homes (Pre-1960) | Highly variable | You may find 12", 14", 17", or 19" OC due to hand-built framing |
Residential walls
Standard residential stud spacing depends on where the wall sits in the house and what it’s carrying. Interior walls are usually framed at 16 inches on center, which gives you a stable, predictable surface for drywall, wall panels, shelving, and cabinets. Exterior walls are traditionally framed the same way, though newer homes built with advanced framing techniques sometimes shift to 24 inches on center to cut down on lumber use and improve energy efficiency, since fewer studs means less thermal bridging and more room for insulation between them.
Load-bearing walls are where spacing matters most. These walls carry weight from the roof and upper floors down to the foundation, so builders almost always frame them at 16 inches on center to handle that extra load. Non-load-bearing partition walls, which just divide space and don’t support structural weight, have more flexibility and occasionally use wider spacing. If you’re not sure whether a wall is load-bearing, treat it as though it is until you’ve confirmed otherwise, and consult a professional before removing or altering it. If you’re comparing wall panels to a traditional finish for an upcoming project, see how Trusscore Wall&CeilingBoard stacks up against drywall for a full side-by-side breakdown.
Garages, basements, and mobile homes
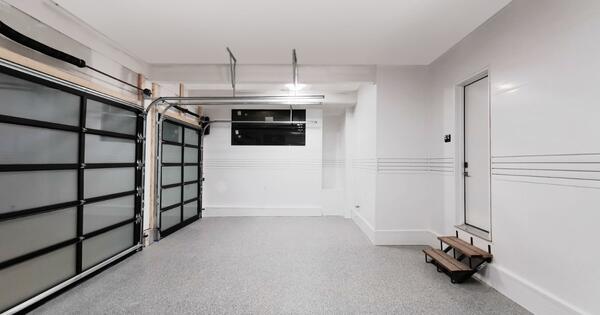
Spacing gets less predictable once you move outside standard living space. Garages commonly mix spacing within the same structure: exterior walls are often framed at 24 inches on center for efficiency, while interior walls dividing the garage from the rest of the house tend to stay at 16 inches on center for extra support. If you’re planning to finish a garage and want a closer look at how wall panels perform in that environment, this guide to drywall alternatives for garage walls covers the details.
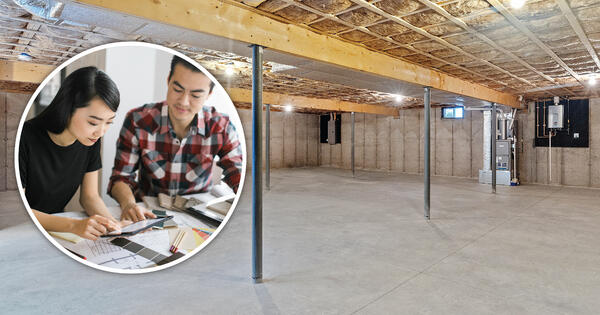
Basements introduce their own variables. Many basements are framed with 24 inches on center spacing, particularly when the walls were finished after the home was originally built rather than framed by the original builder. That’s worth keeping in mind because DIY-framed basement walls can be less consistent than professionally built ones, with spacing that drifts as it works around support posts, plumbing, or mechanical equipment. Before you finish a basement, it’s worth reviewing what to expect from the space; the Trusscore basement applications page is a useful starting point.
Mobile and manufactured homes vary by manufacturer and build era. Exterior walls generally follow spacing standards set by the manufacturer to meet structural and code requirements, while interior partition walls are sometimes framed wider, at 24 inches on center, since they carry less load. If you’re working on a mobile home, it’s worth confirming spacing on each wall individually rather than assuming the whole structure follows one standard.


How to Measure Stud Spacing Accurately
You don’t need to open up the wall to figure out where your studs are and how far apart they sit. With a few basic tools and a bit of patience, you can measure stud spacing directly from the surface of a finished wall.
Tools you'll need
Gather these before you start measuring so you’re not stopping partway through the job.
- A tape measure ideally at least 25 feet long so you’re not limited by wall width.
- A stud finder. Not essential, but it makes the process faster and more accurate.
- Painter’s tape or a pencil for marking stud locations as you find them.
- A level or straight edge. Optional, but helpful for marking vertical reference lines if you need them.
Step-by-step measuring method
Once you have your tools together, follow these steps to map out the studs across a wall.
- Locate the first stud using a stud finder or one of the no-tool methods described in the next section.
- Mark the center point of that stud with a light pencil mark or a small piece of tape.
- Slide the stud finder horizontally across the wall, marking each additional stud as you find it.
- Measure from the center of one stud to the center of the next. That distance is your on-center measurement.
- Confirm the spacing by repeating the measurement in two or three more spots along the same wall.
If you’re not getting a consistent pattern, or you don’t have a stud finder on hand, check around outlets and light switches. Electrical boxes are typically mounted to the side of a stud, which gives you a reliable reference point to start measuring from even without any tools.
How to Find a Wall Stud (With or Without a Stud Finder)
Measuring accurately starts with finding a single stud to work from. There’s more than one way to do it, and having a couple of backup methods is worth it if your first approach doesn’t turn up a clear answer.
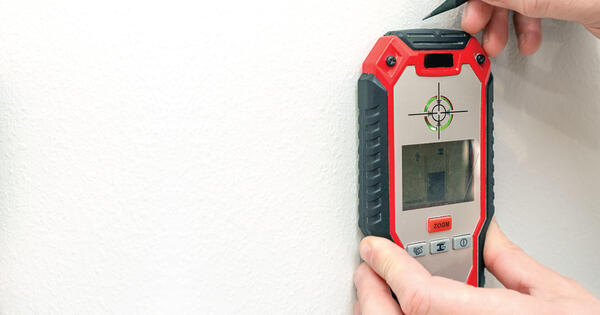
Electronic stud finders are the fastest and most reliable option for most walls. Here’s how to use one correctly:
- Turn on the stud finder and calibrate it according to the manufacturer’s instructions.
- Move it slowly across the wall in a horizontal line until it beeps or lights up.
- Mark the spot. This is likely the edge of the stud, not the center.
- Continue moving in the same direction until it beeps again, which marks the opposite edge.
- Find the center by measuring halfway between the two marks.
No stud finder on hand? A few low-tech methods can still get you there.
- Tapping: knock along the wall with a knuckle and listen for the difference between hollow sections and the duller, more solid sound over a stud.
- Outlets and switches: electrical boxes are almost always mounted to the side of a stud, so measuring 3/4 inch to 1 inch from the edge of the box toward the wall’s center often lands you right on the stud.
- Trim and baseboard: nail heads along the baseboard or window and door casing usually mark where a trim carpenter hit a stud, giving you a rough guide to follow up the wall.
- Magnet method: run a strong magnet slowly across the wall surface; it will pull toward the drywall screws or nails fastened into the studs underneath.
- Finishing nail or pin: in an inconspicuous spot, gently poke through the wall surface to feel for resistance from the framing behind it.
Once you’ve found one stud, measure out in 16-inch or 24-inch increments to estimate where the rest should be, then confirm each one using your stud finder or one of the methods above. Don’t assume the pattern holds perfectly all the way across the wall, especially in older homes or rooms that have been renovated.
Common mistakes to avoid
A handful of avoidable mistakes account for most of the frustration people run into when locating studs, and each one is easy to sidestep once you know what to look for.
- Assuming one measurement applies everywhere: finding 16-inch spacing in one wall doesn’t guarantee the same spacing next door, so confirm each wall separately.
- Measuring from the edge instead of the center: on-center measurements are taken from the middle of one stud to the middle of the next, not from the nearest edges.
- Skipping the double-check: stud finders aren’t perfect, especially near wiring, pipes, or older plaster walls, so recheck any reading that seems inconsistent with the surrounding pattern.
- Drilling before confirming: driving a screw or anchor before you’re sure of the stud’s location risks a weak hold, a cracked panel, or hitting something unexpected behind the wall.
If you’re not confident in a reading, take an extra minute to check it from a second angle before you commit to drilling.


How Stud Spacing Affects Wall Panel Installation
Wall panels install differently than drywall, and stud spacing has a bigger impact on the outcome. Panels are often fastened directly to the framing, so knowing exactly where your studs sit determines how stable, straight, and efficient the installation will be.
When studs are spaced correctly and consistently, a few things happen:
- Panels line up with attachment points: which prevents sagging or buckling over time.
- Fastening goes faster and cleaner: because you know exactly where to place each screw before you start.
- You need less extra material: since you’re not adding furring strips or blocking to compensate for irregular framing.
Many wall panel systems, including PVC wall panels, are designed to install directly over standard 16-inch or 24-inch on-center studs. If your spacing is inconsistent or wider than that, you’ll likely need furring strips or blocking to give the panels solid support before you fasten anything to the wall.
Using Trusscore Wall&CeilingBoard on standard and irregular spacing
Trusscore Wall&CeilingBoard is designed to work with standard wall framing, whether you’re installing over wood studs, steel studs, or existing drywall. Because the panels are lightweight and interlock with a tongue-and-groove system, they go up quickly once you know your stud layout.
If your walls are framed at 16 inches or 24 inches on center, Trusscore Wall&CeilingBoard panels can typically be fastened directly to the studs without any additional materials. If your spacing isn’t consistent, a couple of adjustments keep the installation solid:
- For studs wider than 16 inches on center: add horizontal furring strips, also called strapping, to create consistent fastening support and install Trusscore Wall&CeilingBoard vertically.
- Studs at 24 inches on center or less: install the panels horizontally instead, which lets you fasten directly to each stud without added blocking.
Orientation determines how often you’ll need to fasten the panels:
- Vertical installations: place a screw every two feet along the length of each panel or trim piece.
- Horizontal installations: place a screw at each stud location, typically every 16 or 24 inches.
The right screw depends on what’s behind the panel. Here’s a quick reference:
| Wall Assembly | Screw Recommendation | Screw Length |
|---|---|---|
| Wood Stud | #8 or #10 gauge screw, flat-bottomed low profile head | 1-1/4" |
| Furring Strips or Strapping | #8 or #10 gauge screw, low profile head | 2-1/2" |
| Concrete | 3/16" flathead Tapcon screw | 1-1/4" |
| Metal or Steel Studs | Self-tapping #8 or #10 gauge, low profile head | 1-1/4" |
No matter the wall assembly, use a screw with a minimum head diameter of 3/8 inch for a secure hold and a clean finish, and reach for stainless steel screws only in high-moisture or corrosive environments. One thing worth knowing before you start: stud finders often don’t read accurately through installed Trusscore panels, so mark your stud locations, or keep a written measurement, before the panels go up.
Confirming stud spacing before installation matters even more with PVC wall panels than it does with drywall, since panels are typically fastened directly to the framing rather than screwed into a continuous sheet that can be shimmed or patched later. Getting the layout right the first time saves you from pulling panels back off and starting over. For complete instructions, explore the Trusscore Wall&CeilingBoard product page and download the installation guide before you begin.
FAQ
Are studs always 16 inches apart?
No. While 16 inches on center is the most common spacing in residential framing, many walls, especially in garages, basements, mobile homes, and energy-efficient builds, use 24 inches on center instead. Older homes can be even less consistent, so it’s worth confirming spacing on each wall rather than assuming.
That’s why the measuring and finding methods covered earlier in this guide matter more than memorizing a single number. A quick check with a stud finder or the outlet method takes a few minutes and removes the guesswork before you drill, hang, or install anything.
What does 16 on center mean?
“16 on center” means the distance from the middle of one stud to the middle of the next measures 16 inches, not the gap between the two edges. It’s the standard spacing for most residential framing because it balances structural strength with efficient material use.
This measurement convention is why it’s easy to misjudge spacing if you’re only looking at the visible edges of a stud through a small hole or gap. Always measure center to center, and use the edge-based methods in this guide, like checking outlets or trim nails, only as a starting reference point.
How far apart are studs in a garage or basement?
Garages often mix spacing: exterior walls at 24 inches on center for energy efficiency and interior dividing walls at 16 inches on center for extra support. Basements, especially those finished after the home was built, commonly use 24 inches on center, though DIY framing can introduce inconsistencies worth double-checking.
If you’re planning a garage or basement wall panel project, don’t assume the spacing matches the rest of the house. Measure each wall individually, and pay extra attention around support posts, mechanical equipment, or plumbing runs, since framing often shifts around those obstacles.
How do I find a stud without a stud finder?
Check for outlets and switches, which are usually mounted to the side of a stud, tap along the wall and listen for a duller sound over solid framing, look at trim and baseboard nail patterns, or run a strong magnet across the surface to catch screws or nails fastened into the studs beneath.
Combining two of these methods gives you more confidence than relying on just one. If tapping suggests a stud in roughly the same spot as a trim nail or an outlet, you can be reasonably sure you’ve found solid framing before you drill.
Most walls are framed at 16 inches on center, with 24 inches on center showing up regularly in garages, basements, energy-efficient builds, and some exterior walls. The exact spacing depends on the building type, the wall’s purpose, and sometimes how or when it was framed, which is why it’s worth verifying spacing on the specific wall you’re working on rather than assuming it matches a general rule.
Taking a few minutes to measure and confirm your stud layout before you start pays off in the quality of the finished project, whether you’re hanging a shelf or installing a full wall system. Consistent, correctly identified stud spacing means secure fastening, straight panel lines, and less rework later on.
If your next project involves finishing a wall rather than just hanging something on it, take a look at Trusscore Wall&CeilingBoard and download the installation guide to see exactly how stud spacing factors into a clean, professional-looking install from start to finish.