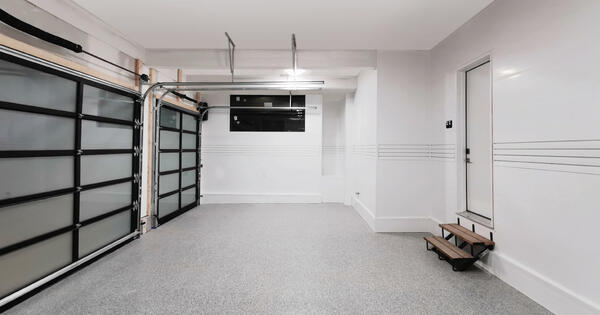
This post was originally published in March 2023. Last updated: July 2026.
An RV wall works harder than any wall in your house. It flexes over every mile of highway, cycles through heat and freezing cold in the same week, takes hits from gear and doors, and sits inches from plumbing, windows, and roof seams that can all leak. The material you choose decides whether a renovation holds up for a decade or has you pulling panels again in two seasons. This guide covers what you need before you buy: how RV walls are built, how the panel materials compare, what each costs per square foot, how to install replacement panels, and where to buy RV wall panels.
What Are RV Walls Made Of?
RV walls aren’t built like house walls. They’re engineered to be as light as possible while holding a structure together at highway speed, and that constraint shapes how they fail.
The three-layer RV wall system
Most RV walls are a sandwich of three layers, each doing a different job.
- Exterior shell: The weather-facing skin, usually fiberglass, aluminum siding, or laminated composite. It’s where most leaks start, at seams, windows, vents, or roof transitions.
- Insulation and framing: Rigid foam board or fiberglass batt held in aluminum tubing or thin wood studs. It controls temperature, and it’s where water hides once it gets past the shell.
- Interior wall layer: The surface you see and touch, almost always thin plywood or luan wrapped in printed vinyl film. RV ceiling panels sometimes differ, using FRP or a vinyl-faced product for weight reasons.
That interior layer is what you’re replacing. It’s thin, rarely structural, and usually stapled, screwed, or glued to the framing, so swapping it doesn’t mean touching the shell.
Why material choice matters for durability and moisture resistance
The interior layer takes more abuse than people expect, and four factors decide how long it lasts.
- Moisture intrusion: Water is what kills RV interiors. A slow leak behind a window can soak a luan panel for months before it shows, and by then the wood has swelled, delaminated, and grown mold.
- Vibration while traveling: Brittle materials crack at fastener points, adhesive bonds work loose, and seams open up. Panels that lock together mechanically hold alignment better than sheets glued to a substrate.
- Weight: Every pound of interior finish is a pound off your cargo capacity, and heavy materials make solo installation nearly impossible.
- Maintenance: RV interiors collect road grime, cooking residue, and wet gear in a small space. If a material can’t be scrubbed, you’re living with the marks.
RV Wall Panel Material Comparison
No single material is right for every rig or budget. A camper stored under cover has different needs than a full-time rig parked in the Pacific Northwest. Here’s how the five common options for RV paneling compare on durability, moisture resistance, maintenance, and cost.
Plywood and luan
Luan is thin tropical hardwood plywood, usually 1/8" or 1/4" thick, and it’s what came out of the factory in most RVs on the road. Luan paneling costs less than almost anything else, cuts with a utility knife, takes vinyl film well, and bends enough to follow the gentle curves in an RV wall. If you’re matching an original interior, it’s the obvious choice.
The problems are just as real. Luan is cellulose, so it’s food for mold the moment it gets damp, and it absorbs cleaning products instead of shedding them. Dents are permanent, and a delaminated sheet can’t be repaired. True 1/8" luan is also getting hard to find, since most stores now stock heavier 1/4" underlayment grades.
MDF
Medium-density fiberboard shows up in RV cabinetry, slide-out fascias, and occasionally wall surfaces where a smooth painted finish is the goal. It’s flat, consistent, and inexpensive.
For an RV, though, MDF has two disqualifying traits. It’s noticeably heavier than luan for the same coverage, which eats cargo capacity and turns a one-person job into a two-person job. And it fails badly when wet: the surface can look water resistant while the fibers underneath swell, soften, and crumble. A damp MDF edge never recovers.
FRP (fiberglass reinforced plastic)
FRP is a fiberglass-faced sheet built for commercial kitchens, car washes, and food processing plants. It’s strong, it wipes clean with chemical cleaners, and it doesn’t rot. Some manufacturers use it on ceilings and in wet areas for those reasons.
The catch is installation. FRP has no rigidity on its own, so it needs a backer board behind it, and it’s bonded with troweled adhesive that’s messy, slow, and full of VOCs you don’t want curing in a sealed space. Seams need moldings and sealant, and those seams are the weak point: moisture that gets behind a sheet separates it from the substrate, and you won’t see the damage until the panel bubbles.
Vinyl and aluminum paneling
Both show up in older trailers and budget renovations, and they share one advantage: they’re light.
Thin vinyl wipes clean, doesn’t absorb water, and installs quickly, but it’s usually flimsy enough to need continuous backing, and thinner grades go brittle with age and UV exposure. Aluminum is tougher and won’t burn, but it dents permanently, conducts heat and cold straight through, and can rattle while you drive. Both work for a quick refresh on an older camper. Neither is a long-term upgrade.
Trusscore Wall&CeilingBoard
Trusscore Wall&CeilingBoard is an interlocking interior PVC wall and ceiling panel, and it addresses most of the failure points the other materials share. It’s why a lot of owners stop replacing camper wall panels and finish their walls once.
- Waterproof construction: The panels are 100% water and moisture resistant, and the tongue-and-groove connection makes a watertight seal at every seam. There’s no substrate and no adhesive to fail.
- Mold resistance: With no cellulose in the material, there’s nothing for mold or mildew to feed on. That matters most where RVs actually get wet, behind windows, around slide seals, and in bathrooms.
- Easy cleaning: The smooth, non-porous surface handles soap and water, chemical cleaners, and even pressure washing.
- Lightweight installation: Panels weigh 0.8 lbs per square foot and fasten straight to framing through a pre-punched screw flange, so one person can hang a wall unaided.
- Durability: The internal truss design in the 1/2" panel resists scratches, dents, and impact, which is what a wall absorbing highway vibration needs.
- Light reflectivity: White panels carry a light reflectivity value of 0.90, reflecting 90% of the light that hits them. In an RV, where interiors run dark and windows are small, that shows immediately, and the panels won’t yellow like paint.
- Trusscore SlatWall compatibility: Trusscore SlatWall integrates directly with Trusscore Wall&CeilingBoard and holds up to 75 lbs per square foot, turning wall space into reconfigurable storage for bikes, gear, and tools.
The same panels are widely used in mobile homes and park models, where the moisture and weight constraints are nearly identical. If RV ceiling panels are part of your project, the guide to mobile home ceiling panels covers that install.
Cost Comparison by Material
Sticker price per sheet is the easiest number to compare and the least useful one. Real cost comes from the extra material an install needs, the labor it takes, and how many years pass before you do it again.
Price per square foot breakdown
These are material-only ranges for the panel itself, before trim, fasteners, and labor, and they shift by region and supplier.
| Material | Approx. cost per sq. ft. | Typical service life in an RV | Maintenance | Moisture resistance |
|---|---|---|---|---|
| Plywood or luan | $0.50 to $1.75 | 5 to 10 years | Repaint or re-cover; replace any water-damaged sheet | Poor |
| MDF | $0.75 to $2.00 | 5 to 8 years | Repaint; edges swell and chip | Very poor |
| FRP | $1.50 to $3.00, plus backer and adhesive | 15 years or more | Wipe clean; reseal seams periodically | Good, but seams are the weak point |
| Vinyl or aluminum | $1.50 to $4.00 | 10 to 20 years | Wipe clean; aluminum dents are permanent | Good |
| Trusscore Wall&CeilingBoard | $2.75 to $3.75 | Decades | Soap and water | Complete, with watertight seams |
The pattern is clear. The cheapest materials per square foot are the ones you’ll replace first, and replacement in an RV means tearing out finished trim, cabinetry, and fixtures to reach a panel that failed for a reason you could have designed out.
Hidden costs
The material invoice is rarely the whole bill. These are the line items that catch people out.
- Adhesives and backer boards: FRP needs both, and thin vinyl needs continuous backing. Panels that fasten straight to framing need neither, removing a material cost and a labor step.
- Trim and finishing: Corners, edges, and transitions all need something. Materials with matched trim systems finish faster than ones where you’re improvising with quarter round.
- Labor: Anything requiring two installers doubles the hourly cost. Weight is a labor cost, not just a payload cost.
- Repairs after water damage: A wall that fails behind the surface takes insulation, framing, and often flooring with it, and remediation costs many times what the panel did.
- Replacement frequency: A material that lasts eight years in a rig you’ll own for twenty is one you’ll buy three times. Trusscore Wall&CeilingBoard delivers roughly 55% savings in total cost of ownership compared to drywall, and the same math holds against wood panels in an RV.

How to Replace or Install RV Wall Panels
Replacing interior RV wall panels is well within reach for an experienced DIYer. The work isn’t difficult, but the sequence matters, and the biggest cause of a failed renovation is rushing past inspection. Plan on a full weekend for a single room.
Tools and prep
Gather everything first, because a partly disassembled RV interior isn’t a good place to pause.
- Measuring and layout: Tape measure, level, chalk line, and stud finder. RV walls are rarely square, so measure every wall at both ends.
- Cutting: A fine-tooth circular saw blade or table saw, a utility knife for thin sheet goods, and tin snips for trim. Test cut on scrap.
- Fasteners: Aluminum tube framing needs self-tapping screws; wood framing takes standard screws. A pre-punched screw flange tells you where to fasten.
- Adhesives: Only if your material requires them, and budget for ventilation and cure time in a sealed space.
- Safety equipment: Eye protection, a dust mask or respirator, gloves, and a fan. Old panels release mold spores when you pull them.
Let panels acclimate in the space for 24 hours before installing, so they move before they’re fastened.
Step-by-step installation
Work these steps in order. Skipping ahead is how hidden problems get sealed inside a finished wall.
- Remove trim, fixtures, and old panels: Take off moldings, outlet covers, light fixtures, and cabinetry fastened through the wall. Keep one old panel as a template if your walls have curves.
- Inspect the framing and insulation: Check every stud, seam, and cavity for staining, softness, rust, and any smell of mildew. Probe suspect areas with a screwdriver.
- Repair water damage and fix the source: Replace compromised framing and wet insulation, then reseal the window, vent, or roof seam above it. New panels over an active leak buy nothing.
- Measure and plan the layout: Measure each wall at top and bottom, decide on orientation, plan where seams land, and account for windows, doors, and outlets.
- Install Universal Base first: The Universal Base of snap-in trims go on before panels, including around all openings, making it easy to install panels across the wall.
- Cut and fit panels: Cut to length, then test fit. Leave 1/4" clearance at panel ends and a 1/8" gap at trim for thermal movement.
- Fasten and continue: Fasten at least every 24" without overtightening. Insert each new tongue into the previous groove, press firmly to seat it, then fasten. Check alignment every few panels.
- Finish: Install the top caps of your snap-in trims, cut in outlets and fixtures, and seal wet-area penetrations with silicone. Reinstall cabinetry with backing behind the panel, never to the panel alone.
Common mistakes to avoid
Most panel failures trace back to one of these four errors, and all four are avoidable.
- Installing over hidden water damage: If you can smell it, it’s there. Open the wall, dry it completely, and fix the source before anything new goes up.
- Using the wrong fasteners: Screws that are too long punch through the exterior shell, and short ones pull out under vibration.
- Skipping expansion gaps: An RV interior can swing 60°F in a day, and a panel fastened tight at both ends will buckle or crack at the fasteners.
- Poor alignment on the first panel: Every panel after it inherits the error. Level the first one at both ends, then check as you go.
Where to Buy RV Wall Panels
Where you shop depends on the job. If you’re patching a small area and want it to disappear into the original interior, you’re looking for a match. If you’re renovating a rig you plan to keep, upgrade to something that won’t put you back in the same wall in five years.
Factory-match luan and vinyl-faced RV interior paneling comes from RV supply retailers and dealer parts counters. Bring a sample, because printed film patterns are hard to match from a photo. Big box lumber yards carry underlayment-grade plywood, MDF, and basic FRP, though the thicknesses skew heavier than RV originals. Building product dealers carry interlocking systems, including Trusscore Wall&CeilingBoard, usually with matching trims in stock. Find your nearest supplier through the Trusscore dealer locator.
What to look for in a dealer or installer
A good supplier saves you a second trip and a bad decision. Ask about four things before you buy.
- Availability and lead time: Can they supply the full quantity now, including matching trims? Running out mid-project with a discontinued pattern is expensive.
- Installation experience: Ask whether they’ve supplied RV, trailer, or park model projects. The framing and fastener questions differ from a garage.
- Product warranties: Get the warranty in writing and understand what voids it. Panel products vary widely here.
- Long-term support: Will the same panel and trim profile still be available in five years if you extend the renovation or need a repair?
Before you order, run your dimensions through the Trusscore Cost & Materials Estimator. It calculates panel counts, trim, and accessories from your measurements, so you avoid shortages and leftover material.
FAQ
These are the questions RV owners ask most often when they start pricing a wall panel project.
Where can I buy RV wall paneling?
Factory-match luan and vinyl-faced paneling come from RV supply retailers and dealer parts counters. Plywood, MDF, and FRP are stocked at building supply stores. Interlocking systems like Trusscore Wall&CeilingBoard are sold through building product dealers, which you can find using the Trusscore dealer locator. Bring a sample if you’re matching an existing interior.
How do I remove old RV wall panels?
Start by removing trim, moldings, outlet covers, light fixtures, and any cabinetry fastened through the wall. Then locate the fasteners, usually staples or screws hidden under trim, and work a pry bar behind the panel from an edge. Pull slowly to avoid damaging framing. Keep one panel intact as a template for curves and cutouts.
How do I replace RV interior wall panels?
Remove the old panels, inspect the framing and insulation for water damage, and repair both the damage and the leak that caused it. Measure each wall at both ends, install perimeter trim, then cut and fasten new panels with proper expansion gaps. Finish by reinstalling trim, fixtures, and cabinetry with backing behind the panel.
What are RV walls made of?
RV walls are built in three layers: an exterior shell of fiberglass, aluminum, or laminated composite; a middle layer of foam or fiberglass insulation held in aluminum or wood framing; and an interior surface layer, typically thin plywood or luan finished with vinyl film. Ceilings often use FRP or vinyl-faced panels for weight reasons.
The material behind your RV wall panels decides more than how the interior looks. It determines how the rig handles a leak you don’t catch right away, how much weight you carry down the highway, and how many times you’ll do this job over the years you own the vehicle. Cheap panels are cheap once. Panels that don’t absorb water, don’t feed mold, and don’t need replacing are cheaper every year after that.
If you’re ready to move forward, request a free estimate to get panel and trim quantities for your rig, find a dealer near you, or learn more about Trusscore Wall&CeilingBoard.
Products for RVs
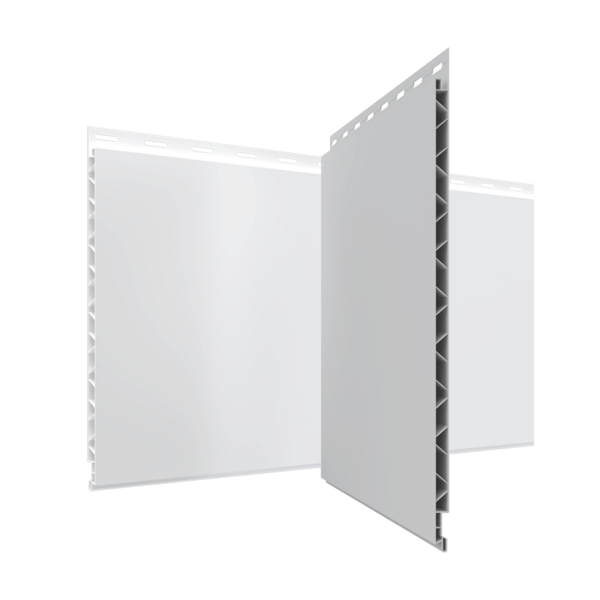
Wall&CeilingBoard
Trusscore Wall&CeilingBoard is an interlocking, interior PVC wall and ceiling panel that is lightweight, low maintenance, and outperforms alternative products like drywall and FRP.
Learn More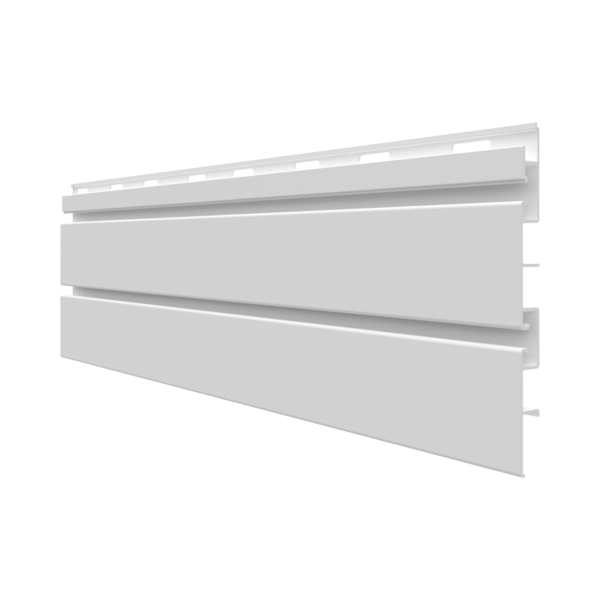
SlatWall
Trusscore SlatWall is a high-strength, on-the-wall organization system that’s easy to install and seamlessly integrates with Trusscore Wall&CeilingBoard.
Learn More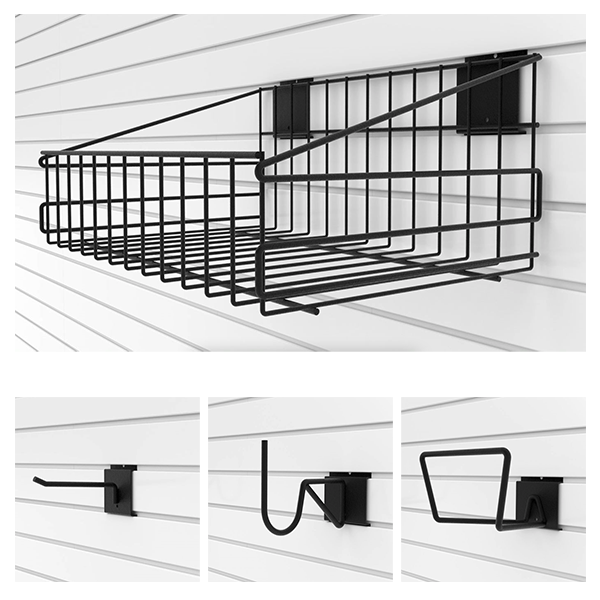
SlatWall Accessories
Trusscore offers several SlatWall hardware options — including hooks, baskets, and shelves — that snap into place and can be easily moved around as your storage needs change.
Learn More
![How Much Does It Cost to Finish a Basement in 2026? [Complete Pricing Guide]](/content/images/cache/blog/cost-basement/basic-land.aae4a3cd.png)