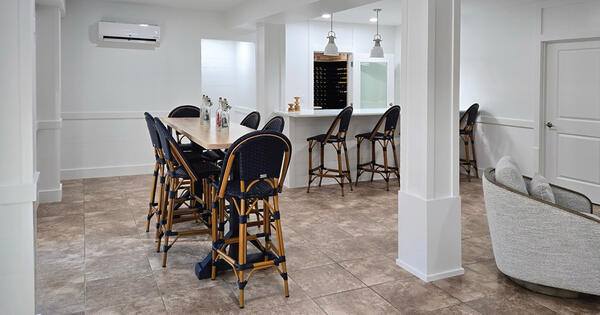
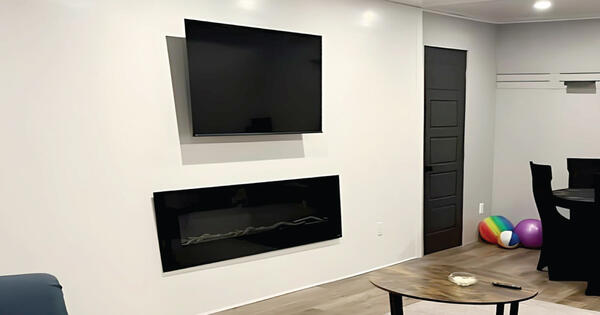
Wainscoting has been a classic interior design element for centuries, originally used to protect walls from damage and add an elegant touch to homes. Traditionally, wainscoting was crafted from wood, bringing a rich, timeless appeal to any room. However, wood has its downsides — it's susceptible to moisture, pests, and requires regular maintenance. Enter PVC wainscoting, a modern alternative that's gaining popularity among homeowners.

Benefits of PVC Wainscoting
Using PVC panels like Trusscore Wall&CeilingBoard to create wainscoting is incredibly practical. Here are some key advantages:
- Durability: Unlike wooden wainscoting, which can easily get damaged, Trusscore Wall&CeilingBoard is designed to be scratch, dent, and impact resistant. This makes it ideal for withstanding the wear and tear of daily life, ensuring your wainscoting stays in excellent condition for years. PVC is also resistant to pests like termites and ants, reducing the risk of infestations.
- Easy Installation: Trusscore Wall&CeilingBoard is perfect for DIY enthusiasts. The pre-finished panels are lightweight and feature a pre-punched screw flange and tongue-and-groove interlocking system, allowing for an easy installation process with no special skills or tools required.
- Moisture Resistance: While wood wainscoting absorbs moisture, Trusscore Wall&CeilingBoard panels are non-porous and 100% waterproof. They won’t absorb water, making them resistant to mold, mildew, and rot. This is particularly beneficial in areas like kitchens, bathrooms, and basements, or in homes in flood-prone or hurricane-prone regions.
- Low Maintenance: PVC panels are low-maintenance and easy to care for. They come pre-finished, so there’s no need for painting, staining, or sealing. And cleaning is a breeze — just wipe them down with soap and water, regular household cleaners, or even a pressure washer.
PVC Wainscoting Maintenance and Care
One of the standout features of PVC wainscoting is its low maintenance requirements. To keep it in top shape, follow these simple tips:
- Regular Cleaning: For day-to-day cleaning, we recommend dusting the panels with a Swiffer and washing the panels using a sponge or soft cloth and a mild cleaning solution.
- Deep Cleaning: If dirt is difficult to remove, we recommend cleaning the walls using a solution that contains 1/3 cup of laundry detergent (e.g., Tide®), 2/3 cup of tri-sodium phosphate (e.g., TSP®), and 3.79 liters (or 1 gallon) of water. You can also wipe away tougher scuffs with a Magic Eraser or melamine sponge.
Avoid using abrasive cleaning pads or cloths because they can scratch the surface of your Trusscore panels. Never use acetone or acetone-based cleaners on your Trusscore installation. If you’re unsure about a cleaning product, apply it to an offcut or to a small, out-of-sight portion of your installation before applying it to the rest of the wall.
PVC Wainscoting Cost Considerations
When planning your PVC wainscoting project, it’s important to consider the various costs involved:
- Material Costs: PVC panels like Trusscore Wall&CeilingBoard are priced per square foot, typically ranging from $2.75 to $3.75 depending on where you live.
- Labor Costs: If you hire a professional, labor costs can add to the overall expense. For Trusscore projects, labor rates typically range from $1.50 to $2 for every square foot used.
- Additional Expenses: Don’t forget tools (like a saw and adhesive) and finishing touches (like trim or molding). These can add a few extra dollars to your budget.
Compared to wood, PVC wainscoting may have a similar upfront cost, but the savings on maintenance and repairs can make it more economical in the long run.
How to Install PVC Wainscoting in Your Home
Trusscore Wall&CeilingBoard can be installed vertically or horizontally depending on your personal preference for the design of your space. No matter which orientation you choose, we provide the materials you’ll need and step-by-step instructions for installing the panels below.
Materials for Installing Trusscore PVC Wainscoting
When installing Trusscore Wall&CeilingBoard, you’ll need the following materials:
- A drill or screw gun
- A radial arm saw or a handheld power saw
- Tin sips
- A tape measure
- A level
- A stud finder (if installing on top of drywall)
- A putty knife
- A utility knife
- Safety glasses
- A face mask
If you’re installing Trusscore Wall&CeilingBoard in a high-moisture environment or in an area at risk of flooding, we also recommend having silicone sealant on hand.

How to Install Trusscore Wall&CeilingBoard Vertically as Wainscoting
All Trusscore Wall&CeilingBoard panels are 16 inches wide, regardless of length, to match typical framing spacing. This makes it easy to install vertically as wainscoting. However, you’ll need a saw on hand to cut the panels down to your desired wainscoting height because the shortest panel offered is 8 feet long.
The installation methods differ slightly depending on whether you intend to install on top of an existing material like drywall or if the wainscoting section is directly on bare studs.
Installing On Top of Drywall
Step 1: Start by measuring up from the floor to the intended height of your wainscoting section and mark this point on each wall. Do this every 2 ft along the wall. Using a level, draw a line across the wall to mark the top of your wainscoting section.
Step 2: Using a stud finder, locate and mark each stud location along the line and then using a level, draw a vertical line down to the floor to mark each stud location.
Step 3: Measure and cut a length of ½" J Trim ensuring to cut it short ½" in one corner only. Align the J Trim with your previously marked top line with the channel facing down towards the floor and fasten to the wall at each stud location.
Step 4: Install ½” J Trim along the bottom of your wall. Wherever you cut the top trim piece short at a corner, do the same for the bottom trim piece. Install ½" J Trim at any openings within your wainscoting section, such as doors.
Step 5: Next, in the corner where you cut the J Trim ½” short, offset the vertical trim piece by ½” from the corner to allow the last panel to fit behind the trim. Use either ½" J Trim or Inside Cove Corner Trim for the vertical corners.
Step 6: Cut the first panel to the desired wainscoting height. Starting in the corner where the J Trim was cut ½” short, place the panel with the tongue side in the corner trim and the groove side facing out. Use a level to ensure it is parallel to the wall and leave a 1/8" gap between the tongue side and the trim. Fasten the panel every 24 inches with the recommended screws.
Step 7: Leave ¼" of clearance at both ends of the panels for expansion and contraction. Do not overtighten the screws.
Step 8: Insert the tongue of the second panel into the groove of the first panel. Press them firmly together and fasten the new panel. Repeat this process for all remaining panels.
Step 9: Periodically check that the panels are straight by measuring the distance from the wall to the edge of the panels at the top and bottom. Adjust if necessary.
Step 10: Trim the last panel on each wall to fit if needed, leaving a 1/8" gap between the edge and the wall.
Step 11: Place the next vertical corner trim piece on top of the last panel you installed with the channel facing away from the panels. Push it tight to the corner and fasten it.
Step 12: Repeat steps 6 to 11 for each wall section until all wainscoting is installed.
Step 13: When you reach the starting corner, insert the last panel behind the trim piece where you left the ½” gap. Trim it if needed to fit. Slide it into place and ensure it is firmly connected to the previous panel.
Installing On Bare Studs
Step 1: Using H Channel Snap-in Trim, separate the U Channel Base from the H Channel top piece. Measure and cut the U Channel Base to fit the entire length of the wall ensuring it is cut ½" short in one corner only. Leave a ¼" gap from the drywall and fasten the U Channel Base to each stud along each wall.
Step 2: Install ½" J Trim along the bottom of each wall. Wherever you cut the top trim piece short at a corner, do the same for the bottom trim piece. Install ½" J Trim at any openings within your wainscoting section, such as doors.
Step 3: Next, in the corner where you cut the J Trim ½” short, offset the vertical trim piece by ½” from the corner to allow the last panel to fit behind the trim. Use either ½" J Trim or Inside Cove Corner Trim for the vertical corners.
Step 4: Cut the first panel to the desired wainscoting height ensuring there is a ¼" gap between the panel and the U Channel Base. Starting in the corner where you cut the trim pieces ½" short, place the panel with the tongue side in the corner trim and the groove side facing out. Use a level to ensure it is parallel to the wall and leave a 1/8" gap between the tongue side and the trim. Fasten the panel every 24 inches with the recommended screws.
Step 5: Insert the tongue of the second panel into the groove of the first panel. Press them firmly together and fasten the new panel. Repeat this process for all remaining panels.
Step 6: Periodically check that the panels are straight by measuring the distance from the wall to the edge of the panels at the top and bottom. Adjust if necessary.
Step 7: Trim the last panel on each wall to fit if needed, leaving a 1/8" gap between the edge and the wall.
Step 8: Place the next vertical corner trim piece on top of the last panel you installed with the channel facing away from the panels. Push it tight to the corner and fasten it.
Step 9: Repeat steps 4 to 8 for each wall section until all wainscoting is installed.
Step 10: When you reach the starting corner, insert the last panel behind the trim piece where you left the ½” gap. Trim it if needed to fit. Slide it into place and ensure it is firmly connected to the previous panel.
Step 11: Finally, measure and cut the H Channel top piece and align the teeth with the grooves on the U Channel Base and press to firmly snap in place and cover all gaps.
How to Install Trusscore Wall&CeilingBoard Horizontally as Wainscoting
Trusscore Wall&CeilingBoard panels are available in 8-, 10-, 12-, 14-, 16-, and 20-foot lengths. We recommend choosing a panel the same length or longer than your wall if possible, when installing the panels horizontally to minimize offcuts. If your wall is longer than any of the lengths provided, you can connect the panels using H-Channel Snap-In Kit Trim (but more on that later!).
Since the panels are 16” wide, you’ll need to install them two to three panels high on the wall depending on your desired wainscoting height.
Installing On Top of Drywall
Step 1: Start by measuring up from the floor to the intended height of your wainscoting section and mark this point on each wall. Do this every 2 ft along the wall. Using a level, draw a line across the the wall to mark the top of your wainscoting section.
Step 2: Using a stud finder, locate and mark each stud location along the line and then using a level, draw a vertical line down to the floor to mark each stud location.
Step 3: Measure and cut a length of ½" J Trim. Align the J Trim with your previously marked top line with the channel facing down towards the floor and fasten to the wall at each stud location.
Step 4: Install ½" J Trim around the perimeter of the room along the bottom of each wall. Install ½" J Trim at any openings within your wainscoting section, such as doors.
Step 5: Cut the first panel to the appropriate length. Starting from the bottom, position the panel with the screw flange pointing away from the floor. Use a level to ensure the panel is properly aligned. Leave a 1/8" gap between the tongue side of the panel and the adjoining trim. Fasten the panel at each stud location with the recommended screws.
Step 6: Leave 1/4" clearance at each end of the panels to allow for expansion and contraction. Do not over-tighten the screws.
Step 7: If your wall is longer than the panel lengths, join the panels using an H Channel Snap-in Trim Kit. Refer to the Joining Panels section of your Trim Applications documentation for detailed instructions.
Step 8: With the first row of panels installed, continue with the next row above it. Insert the tongue of the second panel into the groove of the first panel. Press the panels firmly together to ensure a proper connection. Once they are securely interconnected, fasten the new panel.
Step 9: The top row of panels may need to be trimmed to fit the desired wainscoting height. Refer to the Ripping Panels section for detailed instructions. Leave a 1/8" gap between the ripped edge of the panel and the top trim.
Step 10: Use a putty knife to bend the top trim to allow the top panel to be inserted.
Step 11: After installing the panels up to the desired wainscoting height, place J Trim or Inside Corner Cove trim in each corner. Position the trim against the panel with the channel facing away. Push it tight to the corner and fasten it to the wall.
Step 12: Move to the opposite wall and install the trim and panels in the same manner as the first wall.
Step 13: For the remaining walls, insert each panel end into the vertical trim pieces and slide down into the bottom trim piece first, then interlock the tongue and groove for each subsequent panel.
Installing On Bare Studs
Step 1: Using H Channel Snap-in Trim, separate the U Channel Base from the H Channel top piece. Measure and cut the U Channel Base to fit the entire length of the wall. Leave a ¼" gap from the drywall and fasten the U Channel Base to each stud along each wall.
Step 2: Install ½" J Trim along the bottom of each wall and at any openings within your wainscoting section, such as doors.
Step 3: Cut the first panel to the appropriate length. Starting from the bottom, position the panel with the screw flange pointing away from the floor. Use a level to ensure the panel is properly aligned. Leave a 1/8" gap between the tongue side of the panel and the adjoining trim. Fasten the panel at each stud location with the recommended screws.
Step 4: Leave 1/4" clearance at each end of the panels to allow for expansion and contraction. Do not over-tighten the screws.
Step 5: If your wall is longer than the panel lengths, join the panels using an H Channel Snap-in Trim Kit. Refer to the Joining Panels section of your Trim Applications documentation for detailed instructions.
Step 6: With the first row of panels installed, continue with the next row above it. Insert the tongue of the second panel into the groove of the first panel. Press the panels firmly together to ensure a proper connection. Once they are securely interconnected, fasten the new panel.
Step 7: The top row of panels may need to be trimmed to fit the desired wainscoting height. Refer to the Ripping Panels section for detailed instructions. Leave a ¼" gap between the ripped edge of the panel and the U Channel Base.
Step 8: After installing the panels up to the desired wainscoting height, place J Trim or Inside Corner Cove trim in each corner. Position the trim against the panel with the channel facing away. Push it tight to the corner and fasten it to the wall.
Step 9: Move to the opposite wall and install the trim and panels in the same manner as the first wall.
Step 10: For the remaining walls, insert each panel end into the vertical trim pieces and slide down into the bottom trim piece first, then interlock the tongue and groove for each subsequent panel.
Step 11: Finally, measure and cut the H Channel top piece and align the teeth with the grooves on the U Channel Base and press to firmly snap in place and cover all gaps.
PVC wainscoting is a versatile and practical choice for any homeowner looking to enhance their interior design. With its durability, low maintenance, and variety of styles, it’s an excellent investment for high-moisture areas like bathrooms, kitchens, and basements. Consider PVC wainscoting for your next home improvement project and enjoy a beautiful, hassle-free upgrade to your living space.


