Getting into DIY construction is exciting, and the key to success lies in the unsung heroes of building – fasteners.
Whether it's nails, screws, bolts, or anchors, these small but crucial parts determine the strength and durability of your creations. In this guide, we'll cover everything DIYers need to know about picking, using, and mastering the world of fasteners for successful projects.
Types of Fasteners
What are fasteners?
Fasteners are devices or components used to join two or more objects together to create rigid structures. They’re essential in construction, manufacturing, and various other applications where secure connections are required. Fasteners come in a variety of forms, including screws, nails, bolts, anchors, and more.
What are the main differences between screws, nails, bolts, and anchors?
Let's break down the differences between screws, nails, bolts, and anchors based on their respective design, usage, and applications:
| Design | Usage | Application | |
|---|---|---|---|
|
Screws
|
Screws have helical threads that wrap around a central shaft. | Used for securing materials together by being turned into a pre-drilled hole. | Commonly used in woodworking, metalworking, and construction. |
|
Nails
|
Nails are straight, slender metal pins with a pointed end. | Driven directly into materials without the need for pre-drilled holes. | Widely used in carpentry, framing, and general construction. |
|
Bolts
|
Bolts have a threaded shaft with a head at one end and a nut on the other end. | Require nuts to secure objects together, and typically used with washers. | Used in heavy-duty applications where a strong and durable connection is required. |
|
Anchors |
Anchors are devices used to attach objects or structures to a surface. | Provide stability by expanding or gripping within a material. | Used for securing objects to walls, ceilings, or other surfaces, especially in masonry or concrete. |
When is it preferable to use one type of fastener over another?
Feeling a bit lost in the screws, nails, bolts, and anchors aisle? Here's a quick guide to help you decide on which fastener to buy:
- Screws: Go for screws when you need a strong, durable connection, especially in woodworking or when disassembly might be needed.
- Nails: Nails are your pick for quick and straightforward applications, like framing, where strength and disassembly take a back seat.
- Bolts: Choose bolts for heavy-duty tasks demanding strength and stability, especially in construction and machinery.
- Anchors: Opt for anchors when you need to secure objects to surfaces like concrete or masonry, providing stability and preventing any unwanted movement, or when fastening heavy items to drywall.
In the end, the choice of a fastener depends on factors like the materials involved, the required connection strength, ease of installation, and the specific demands of your project.
| Use Nails For: | Use Screws For: |
|---|---|
|
Framing and Carpentry: Nails are commonly used in framing and carpentry, especially for attaching structural elements like studs and joists. They provide quick and efficient connections in these applications. Speed and Efficiency: Nailing is generally faster than screwing. For large-scale construction projects where speed is essential, nails may be the preferred choice. Temporary Connections: In some cases, where a temporary connection is needed or disassembly is expected, nails are easier to remove than screws. Wood-to-Wood Connections: When joining wood-to-wood in non-load-bearing applications, such as trim or moldings, nails may be more suitable due to their ease of installation. Construction with Shear Loads: Nails are often preferred in applications where the primary force is shear, such as attaching plywood to a wooden frame. |
Structural Joinery: Screws provide a stronger and more secure connection in structural joinery applications. They are often preferred for building furniture or cabinets. MDF or Particleboard: In materials like medium-density fiberboard (MDF) or particleboard, screws offer better holding power compared to nails, making them a preferred choice for assembling furniture. Drywall Installation: Screws are commonly used for attaching drywall to studs due to their ability to create a tight and secure connection. Wood-to-Metal Connections: When joining wood to metal, screws are often preferred due to their ability to grip both materials securely. Applications Requiring Precise Placement: For projects where precise placement is crucial, such as assembling delicate woodworking pieces or attaching hardware, screws provide better control. Outdoor Applications: In outdoor projects, where exposure to weather may cause materials to expand and contract, screws can provide a more reliable and lasting connection. |
Wood Screws
What is the difference between wood screws and general-purpose screws?
The difference between wood screws and general-purpose screws is in its design and thread, head and point type, and material compatibility:
| Wood Screws | General-Purpose Screws | |
|---|---|---|
| Design and Thread | Specifically designed for use in wood. They typically have a coarser thread that is deep and aggressive, providing better grip and holding power in wood. | These screws have a more universal design and can be used in various materials, including wood, metal, and plastic. They often have a finer thread compared to wood screws. |
| Head Type | Commonly have a flat or oval head with a deep recess (such as Phillips or square) that allows for better countersinking into wood surfaces. | May have different head types (flat, pan, round, etc.) depending on the intended application and the materials involved. |
| Point Type | Typically feature a sharp point to easily penetrate wood without the need for pre-drilling. | May have various point types, including self-drilling or self-tapping points, suitable for different materials. |
| Material Compatibility | Primarily designed for use in wood, providing optimal performance and holding power in wooden structures. | Versatile and suitable for a broader range of materials, making them more adaptable for various applications. |
Are there specific wood screws for hardwood vs. softwood?
While wood screws can generally be used in both hardwood and softwood, there are some considerations for optimal performance:
| Hardwood | Softwood | |
|---|---|---|
| Screw Thread Type | In hardwoods, which are denser, using wood screws with a coarser and deeper thread is often recommended for better grip and holding power. | In softer woods, a slightly finer thread may be sufficient, but it depends on the specific application. |
| Screw Length and Size | Due to the increased density of hardwood, longer and thicker screws may be necessary to ensure a secure connection. | Shorter and thinner screws may be suitable for softer woods, but the specific requirements depend on the project. |
| Screw Material | Stainless steel or coated screws are often preferred for hardwood applications to prevent corrosion. | While stainless steel is still a good option, other coated or plated screws may also be suitable. |
In summary, while wood screws can be used in both hardwood and softwood, selecting the appropriate thread type, length, and material is essential for optimal performance based on the specific characteristics of the wood being used.
Drywall Fasteners
What type of screws should I use to fasten items to drywall?
When fastening items to drywall, it's essential to use screws specifically designed for this purpose. Drywall screws have features that make them suitable for securely attaching items to drywall without causing damage. Here are some key characteristics of drywall screws so you know what to look for:
- Coarse Thread: Drywall screws have a coarse thread that helps them grip the drywall more effectively during installation.
- Sharp Point: The screws typically have a sharp, pointed tip that allows for easy penetration into the drywall without the need for pre-drilling.
- Bugle Head: Drywall screws often have a bugle head, which is a slightly rounded head with a flat top. This design helps to prevent the screw from tearing the paper surface of the drywall.
- Phillips or Square Drive: Drywall screws usually come with either Phillips or square drive heads, allowing for easy driving with a screwdriver or power drill.
- Common Sizes: Drywall screws are commonly available in sizes such as #6, #8, and #10, with lengths ranging from 1 inch to 3 inches or more.
- Length Variations: Drywall screws come in various lengths to accommodate different thicknesses of drywall and the items being attached.
When using drywall screws, keep these tips in mind:
- Select the Right Length: Choose a screw length that is appropriate for the thickness of the drywall and the material you are attaching. The screw should be long enough to penetrate the drywall and secure the item firmly.
- Spacing and Placement: Follow recommended spacing guidelines for screw placement when attaching items to drywall. Proper spacing ensures even support and prevents sagging or damage to the drywall.
- Use a Screwdriver or Power Drill: Drywall screws can be installed manually with a screwdriver or using a power drill. When using a power drill, be cautious not to overtighten the screws, as this can damage the drywall.
- Avoid Overdriving: Be mindful not to overdrive the screws, as this can cause the drywall to crack or the screwhead to sink too deeply.
- Consider Weight and Load: If you’re attaching heavy items to the drywall, consider the weight capacity of the screws. For heavier loads, additional support may be needed, such as using anchors or finding wall studs for attachment.
When in doubt, refer to the specific guidelines provided by the manufacturer of the drywall screws you are using. Using the right type and size of screws ensures a secure and stable attachment to the drywall surface.
What type of anchors should I use for hanging heavier items on drywall?
When it comes to hanging heavy items on drywall, choosing the right anchors is crucial to ensure a secure and stable installation. Drywall is a relatively delicate material, and using the appropriate anchors helps prevent damage and ensures that your items remain safely attached to the wall. Below are some common types of anchors suitable for hanging items on drywall:
| Usage | Installation | |
|---|---|---|
| Plastic Expansion Anchors | Plastic expansion anchors are generally suitable for light to medium-duty items. Weight capacity can vary based on factors such as anchor size, wall material, and installation method. In typical applications, plastic expansion anchors may support loads ranging from a few pounds to around 30 pounds or more. | Drill a small hole, insert the anchor, and screw the screw into the anchor. |
| Threaded Drywall Anchors | Threaded drywall anchors come in various sizes and designs, and their weight limits can vary. In general, smaller threaded anchors may support loads in the range of 10 to 20 pounds, while larger and more robust versions can handle heavier loads, potentially up to 75 pounds or more. Always check the manufacturer's guidelines for specific weight limits. | Pre-drill a hole, insert the anchor, and screw it in until flush with the wall. |
| Toggle Bolts | Toggle bolts are known for their strong holding power. Smaller toggle bolts might support around 10 to 20 pounds, while larger ones can handle loads exceeding 50 pounds. | Requires drilling a larger hole; the toggle opens behind the wall for added support. |
| Molly Bolts | Molly bolts, also known as hollow wall anchors, have weight limits that can vary based on their design and size. Light-duty molly bolts may support around 10 to 20 pounds, while heavy-duty versions can handle loads exceeding 50 pounds. | Requires pre-drilling; as the screw tightens, the metal sleeve expands behind the drywall. |
| Self-Drilling Anchors | Self-drilling anchors, also called self-tapping anchors, are designed for easy installation. The weight limits can vary based on the anchor size and material. In general, these anchors may support loads ranging from a few pounds to around 50 pounds or more, depending on the specific anchor type and size. | Drill the anchor directly into the drywall without pre-drilling. |
Are there specific considerations for attaching heavy objects to drywall?
Attaching heavy objects to drywall requires careful consideration and proper planning to ensure a secure and safe installation. Here are key considerations to keep in mind when dealing with heavier items:
- Wall Studs: Whenever possible, attach heavy items to wall studs for maximum support. Use a stud finder to locate studs behind the drywall.
- Load Distribution: Distribute the weight across multiple anchors or screws rather than relying on a single point of attachment.
- Anchor or Screw Weight Ratings: Check the weight capacity of the chosen anchors or screws to ensure they can support the load.
- Installation Depth: Ensure that the anchors or screws penetrate the drywall sufficiently to provide a secure hold.
- Consideration of Wall Type: Be aware of the type of wall behind the drywall (e.g., concrete, plaster) as this may influence the choice of anchors.
- Use of Reinforcements: Consider using additional reinforcements such as wall cleats or braces for extremely heavy items.
- Professional Installation: For very heavy objects, or if unsure, consider consulting a professional for installation.
By understanding the different types of screws and anchors available and considering the specific needs of your hanging project, you can achieve a secure and reliable attachment to drywall.
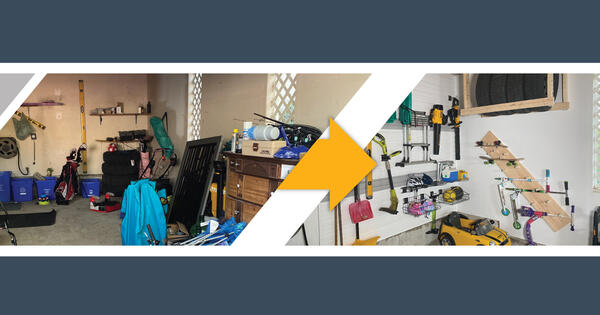
Trusscore Fasteners
How do I fasten items (hooks, screws, wall art, décor, etc.) into Trusscore Wall&CeilingBoard panels?
To organize your space and attach items to your wall, we recommend installing Trusscore SlatWall. Trusscore SlatWall is a high-strength, on-the-wall storage solution that seamlessly integrates with Trusscore Wall&CeilingBoard panels and can be instantly accessorized with snap-in hooks, baskets, and shelves.
However, we understand Trusscore SlatWall may not meet your specific design needs. If you still want to mount or fasten items directly to Trusscore Wall&CeilingBoard, keep this advice in mind:
- When hanging an item directly on a Trusscore Wall&CeilingBoard panel, items should never be directly fastened without back support.
- Lightweight items (i.e., less than 30 pounds) can be attached directly to Trusscore Wall&CeilingBoard using adhesive hooks such as Command™ Hooks or using spring toggle bolt kits.
- Moderate weight items should be fastened directly to the supporting structure of the wall or ceiling through Trusscore Wall&CeilingBoard. Mounting holes should be slightly oversized to accommodate for expansion and contraction of the panel.
- Heavyweight items should be mounted directly to the supporting structure to avoid crushing your Trusscore Wall&CeilingBoard panels. We recommend completely cutting out Trusscore Wall&CeilingBoard from the mounting area.
What type of screws do I need to use when installing Trusscore Wall&CeilingBoard?
Trusscore Wall&CeilingBoard can be installed with any readily available wood (corrosion-resistant) screws with a minimum head diameter of 3/8”, but we recommend different types of screws for different wall assemblies:
| Wall Assembly | Screw Recommendation |
|---|---|
| Wood | #10 X 1-1/4” Truss or Pancake Head |
| Concrete | 3/16” x 1-1/4” Flathead screws |
| Metal Studs or Steel Studs | Metal Studs or Steel Studs |
Stainless steel screws are only required for highly corrosive or moist environments.
How many screws do I need when installing Trusscore Wall&CeilingBoard?
Use one fastener or screw per two square feet of space when installing Trusscore Wall&CeilingBoard.
Anchors and Wall Materials
What type of anchors should I use for different wall materials (drywall, concrete, brick)?
Selecting the right type of anchor depends on the wall material you’re working with:
| Drywall | Concrete or Masonry | Brick or Block | |
|---|---|---|---|
|
Plastic Expansion Anchors: Suitable for lightweight to medium items. Threaded Drywall Anchors: Designed for medium-weight items. Toggle Bolts: Ideal for heavier items. |
Concrete Screws: Self-tapping screws designed for concrete. Sleeve Anchors: Expand against the concrete for a secure hold. Wedge Anchors: Suitable for heavy loads in concrete. |
Sleeve Anchors: Effective in brick and block. Expansion Anchors: Expand when tightened for a secure grip. Plastic Anchors with Screws: Suitable for lighter items in brick. |
How do I choose the right anchor for the weight of the object I'm hanging?
There are a few things to do and consider before installing an anchor and hanging a heavy object on your wall:
- Determine Weight Load: Identify the weight of the object you intend to hang, including any additional stress or dynamic forces.
- Check Manufacturer Ratings: Refer to the anchor's packaging or the manufacturer's specifications to find weight capacity information. The manufacturer provides guidelines for the maximum load the anchor can support.
- Choose the Appropriate Anchor Type: Select an anchor type suitable for the wall material and the weight of the object. For heavier loads, consider anchors like toggle bolts, wedge anchors, or heavy-duty screw anchors.
- Use Multiple Anchors: Distribute the weight across multiple anchors if necessary. This reduces the load on each individual anchor and provides additional stability.
- Factor in Wall Material: Consider the wall material, as different anchors are suitable for different surfaces. For instance, use anchors designed for drywall in drywall and anchors suitable for masonry in concrete or brick.
Metal Fasteners
Can I use the same screws for both wood and metal materials?
In certain cases, you can use the same screws for both wood and metal materials, but it's important to consider a few factors:
- Thread Type: Screws designed for wood typically have a coarser thread, providing better grip in wood fibers. Metal screws may have a finer thread, suitable for tapping into metal surfaces.
- Point Type: Wood screws often have a sharp point for easy penetration into wood without pre-drilling. Metal screws may have a self-drilling or self-tapping point to cut into metal surfaces.
- Material Compatibility: Ensure that the screws are made from a material suitable for both wood and metal, such as stainless steel.
- Length and Size: Consider the length and size of the screw to ensure it provides adequate grip in both materials.
- Coating or Finish: Choose screws with coatings or finishes that enhance corrosion resistance, especially if used outdoors or in humid environments.
If you're working with a combination of wood and metal, consider screws designed for multi-material use. These screws typically have features that make them versatile enough to be effective in both wood and metal applications.
Are there corrosion-resistant screws for outdoor metal applications?
When working with metal outdoors, especially in areas prone to moisture, it's crucial to use corrosion-resistant screws to prevent rust and degradation. Here are some options:
- Stainless Steel Screws: Stainless steel is highly corrosion-resistant and suitable for outdoor applications. Look for screws labeled as "stainless steel" or with a specific grade like 304 or 316 for better corrosion resistance.
- Coated or Galvanized Screws: Zinc-coated or galvanized screws provide a protective layer that helps prevent corrosion. They are suitable for outdoor use but may not be as corrosion-resistant as stainless steel.
- Weather-Resistant Coatings: Some screws come with weather-resistant coatings or finishes designed to protect against corrosion in outdoor environments.
- Bronze or Brass Screws: Bronze and brass screws are corrosion-resistant and can be suitable for outdoor applications, but they may have different aesthetic considerations.
Before selecting screws for outdoor metal applications, check the manufacturer's specifications to ensure they are explicitly designed for outdoor use and have the necessary corrosion resistance for your specific environment. Consider the climate, exposure to moisture, and the types of materials being joined to make an informed choice.
Screw Sizes
How do I determine the right screw size for my project?
Choosing the right screw size for a project involves considering several factors to ensure a secure and effective connection. Here are the steps to help you determine the appropriate screw size:
- Identify the Material: Consider the type of material you are working with (wood, metal, plastic, etc.), as different materials may require different screw types.
- Determine the Thickness: Measure the thickness of the materials you are joining, as this will help determine the length of the screw needed.
- Consider Load and Stress: Assess the load or stress the screw will bear. Heavier loads or greater stress may require larger or stronger screws.
- Check Manufacturer Guidelines: Consult the manufacturer's guidelines for the materials you are working with. Manufacturers often provide recommendations for the appropriate screw size and type for their products.
- Choose the Right Head Type: Consider the type of screw head needed for your project (flat, pan, round, etc.) based on the application and aesthetic preferences.
- Select the Right Thread Type: Choose the appropriate thread type for the material. Coarser threads are generally suitable for wood, while finer threads may be used for metal.
- Use a Screw Sizing Chart: Refer to screw sizing charts available online or at hardware stores. These charts provide information on screw sizes based on material thickness and application.
- Consider Pre-Drilling: For wood or other materials that may split, consider pre-drilling pilot holes to prevent damage and ensure proper screw placement.
What is the significance of the numbers used to label screw sizes?
Screw sizes are typically indicated by a series of numbers and letters, such as #8-32 or 4.5mm x 20mm. Here's a brief explanation of the significance of these numbers:
- Gauge or Diameter (e.g., #8, 4.5mm): The first number represents the gauge or diameter of the screw. In the imperial system, lower numbers indicate larger screws, while in the metric system, the diameter is specified in millimeters.
- Thread Count or Threads Per Inch (e.g., 32): The second number represents the thread count or threads per inch (TPI) in the imperial system. A higher TPI indicates finer threads. In metric screws, the pitch is specified in millimeters, and a lower pitch indicates coarser threads.
Understanding these numbers is crucial for selecting the right screw size. For example, a #8-32 screw has a diameter of a #8 screw with 32 threads per inch.
When in doubt, consult with a hardware professional, use sizing charts, or refer to manufacturer guidelines to ensure you choose the appropriate screw size for your specific project requirements.
Choosing the Right Screw Length
How do I select the appropriate length for screws based on the thickness of materials?
Choosing the correct screw length is crucial to ensure a secure and reliable connection between materials in any project. Here are steps to guide you in selecting the appropriate screw length based on the thickness of the materials:
- Measure Material Thickness: Begin by accurately measuring the thickness of each material you plan to join, using a caliper, ruler, or tape measure.
- Calculate Screw Length: Calculate the ideal screw length by adding the thickness of the first material to the thickness of the second material. Additionally, include an extra 1/4 inch (6.35 mm) to account for proper penetration into the second material.
- Consider Pilot Holes: When working with wood screws, factor in the length needed for the pilot hole. The pilot hole should be slightly shorter than the overall screw length to allow for proper threading.
- Check Manufacturer Guidelines: Refer to the manufacturer's guidelines for the specific screws you are using. Manufacturers often provide recommendations for screw length based on the intended application.
- Use the Right Fastener for the Job: Different materials and applications may require different types of screws. Ensure that you are using screws designed for the specific materials and conditions of your project.
- Account for Additional Factors: If the screws will be subject to heavy loads or stress, consider choosing longer screws for extra stability.
Are there guidelines for preventing screws from protruding or sinking too deeply?
Ensuring that screws are properly seated and do not protrude or sink too deeply is essential for achieving a professional finish in your projects. Here are guidelines to prevent these issues:
- Protruding Screws: In cases where screws are protruding, they can be trimmed using a hacksaw or an oscillating tool. Exercise caution to avoid damaging the surrounding material.
- Countersinking: To address screws that are too long and sink too deeply, consider using countersinking techniques to create a recess for the screw head. This ensures a flush or slightly below the surface finish.
- Using Washers: Adding washers beneath the screw head can help distribute pressure and prevent the screw from sinking too deeply into the material.
- Depth Stops on Power Tools: Use depth stop settings on drills and drivers to control how deep the screws are driven when using power tools.
- Pre-Drilling and Pilot Holes: Pre-drilling pilot holes can control the depth of the screw. Ensure that the pilot hole is slightly smaller than the screw diameter for proper grip.
- Adjustable Depth Screwdrivers: Consider using screwdrivers with adjustable depth settings to control how deep the screws are driven.
Always conduct tests on scrap material before applying screws to your actual project to ensure the correct depth is achieved. Additionally, adhering to best practices for the specific type of screw and material you are working with can help prevent issues related to protrusion or sinking.
Fastener Removal
How can I safely remove a stripped screw?
Encountering a stripped screw can be frustrating, but several methods can help you safely remove it without causing further damage. Here are some techniques you can try:
- Rubber Band or O-Ring: Place a rubber band or a piece of an o-ring over the stripped screwhead and press the screwdriver into the rubber as you turn. The added grip can help loosen the screw.
- Pliers or Adjustable Wrench: Grip the screw head with a pair of pliers or an adjustable wrench and turn it counter-clockwise. Apply steady pressure while turning.
- Use a Screwdriver with a Larger Size: If the screw is only partially stripped, try using a screwdriver with a larger size to get a better grip.
- Tap with a Hammer: Lightly tap the end of the screwdriver to seat it firmly in the screw head, and then turn it counter-clockwise.
- Cut a New Groove: Use a hacksaw or rotary tool to carefully cut a new groove into the screwhead, turning it into a flathead screw. Then, use a flathead screwdriver to remove it.
- Pilot Hole and Screw Extractor: Drill a pilot hole into the center of the stripped screw and insert a screw extractor. Turn the extractor counter-clockwise to remove the screw.
- Heat and Cold: Apply heat to the area around the screw using a hairdryer or a heat gun. After heating, cool it rapidly with a can of compressed air. The thermal expansion and contraction may help loosen the screw.
Are there special tools for extracting screws or nails?
Encountering stubborn screws or nails that need extraction requires the right tools for the job. Here are some tools you can use to safely extract screws or nails:
- Screw Extractor: A specialized tool designed to grip and remove stripped or damaged screws, often equipped with a drill bit for creating a pilot hole.
- Pliers or Vise Grips: These tools can be used to grip the screw head or shaft and turn it counter clockwise.
- Hammer and Nail Punch: When dealing with nails, a nail punch and hammer can drive the nail below the surface for easy removal.
- Cat's Paw Nail Puller: Featuring a V-shaped forked end, this tool grips and pulls nails from wood.
- Pry Bar or Crowbar: For larger or deeply embedded nails, a pry bar or crowbar can be used to leverage and pull them out.
- Drill and Pliers for Nails: If the nail is flush with the surface, drill a small hole next to it, insert pliers, and grip the nail shaft to pull it out.
How do I remove an anchor from the wall?
Removing an anchor depends on the type used:
- Plastic Expansion Anchors: Gently tap the anchor into the wall with a hammer until it's below the surface. Patch and paint over the hole.
- Threaded Drywall Anchors: Unscrew the anchor counter-clockwise until it's free. If it leaves a hole, patch and paint.
- Toggle Bolts: Unscrew the bolt counter-clockwise to remove the toggle from the wall. Patch and paint any holes left by the screws.
- Concrete Anchors (Screws, Sleeve Anchors, Wedge Anchors): For screws, unscrew them counter-clockwise. For sleeve anchors, use a wrench to turn counter-clockwise until loose. For wedge anchors, knock them deeper into the hole, patch, and paint.
- Plastic Anchors in Brick or Block: Tap the anchor into the wall until it's below the surface. Patch and paint over the hole.
Remember to prioritize safety by wearing appropriate protective gear and, if needed, consult with professionals for more challenging extractions.
Fastener Storage and Organization
What is the best way to organize and store different types of fasteners?
Keeping your fasteners organized is essential for efficiency and easy access during projects. Here are some effective ways to organize and store different types of fasteners:
- Divided Storage Containers: Use small, compartmentalized storage containers with adjustable dividers. Label each compartment for specific types and sizes of fasteners.
- Drawer Cabinets: Invest in drawer cabinets with multiple drawers. Label each drawer based on the type, size, or application of the fasteners stored inside.
- Toolbox Inserts: If you have a toolbox, consider using inserts with multiple sections. This allows you to keep different types of fasteners separated and easily accessible.
- Magnetic Strips or Trays: Attach magnetic strips or trays to the wall or inside a cabinet. Magnetic surfaces are useful for organizing and quickly accessing metal fasteners.
- Hardware Organizers: Use hardware organizers with multiple compartments, typically designed for screws, nails, nuts, and bolts. These organizers often have transparent lids for easy visibility.
- Stackable Bins: Stackable bins or containers are convenient for larger quantities of fasteners. Label each bin to quickly identify its contents.
- Labeled Jars or Containers: Repurpose clear jars or containers and label them for different types of fasteners. This provides visibility and easy identification.
- Hanging Jars or Bags: Hang jars or small bags from a pegboard or wall-mounted rack. This method is both practical and visually appealing.
How can I prevent rust or corrosion on my stored screws and nails?
Preventing rust or corrosion in stored screws and nails is crucial for maintaining their integrity. Here are some tips to help protect your fasteners:
- Dry Storage Environment: Store fasteners in a dry environment to prevent moisture buildup, as humidity can contribute to rust.
- Use Desiccants: Place desiccant packs inside containers to absorb any moisture and help maintain a dry environment.
- Anti-Corrosion Coatings: Choose fasteners with anti-corrosion coatings, such as zinc plating or galvanization, for added protection.
- Oil-Based Lubricants: Apply a light coating of oil-based lubricants or rust inhibitors to fasteners before storing them. This helps create a protective barrier against moisture.
- Ventilation in Storage Containers: Ensure that storage containers have adequate ventilation to prevent condensation and allow air circulation.
- Sealable Containers: Use sealable containers to create an airtight environment, protecting fasteners from external elements.
- Regular Inspection: Periodically inspect stored fasteners for any signs of rust or corrosion. Replace any affected fasteners promptly.
- Climate-Controlled Storage: If possible, store fasteners in a climate-controlled space to maintain a consistent and dry environment.
- Avoid Mixing Materials: Avoid mixing different types of metals in the same storage container, as some metals can accelerate corrosion when in contact.
By implementing these organizational and preventive measures, you can ensure that your fasteners remain in good condition and are readily available for your next project.
Fasteners for Outdoor Applications
Are there specific screws or fasteners designed for outdoor use?
Outdoor applications expose fasteners to harsh weather conditions, making it crucial to choose screws and fasteners specifically designed for outdoor use. Here are some types of screws and fasteners suitable for outdoor projects:
- Stainless Steel Screws: Stainless steel screws are highly resistant to corrosion and rust, making them an excellent choice for outdoor applications. Look for screws labeled as "stainless steel" or with a specific grade like 304 or 316.
- Coated or Galvanized Screws: Zinc-coated or galvanized screws have a protective layer that helps prevent rust. They are suitable for outdoor use, although not as corrosion-resistant as stainless steel.
- Exterior Deck Screws: Designed specifically for outdoor decking, these screws often have corrosion-resistant coatings and features to withstand exposure to the elements.
- Silicon Bronze Screws: Silicon bronze screws offer excellent corrosion resistance and are particularly suitable for marine environments. They develop a patina over time, giving them a distinctive appearance.
- Composite Deck Screws: These screws are designed for use with composite decking materials. They are often coated or treated for enhanced durability in outdoor settings.
- Outdoor Wood Screws: Wood screws designed for outdoor use typically have coatings or treatments that protect against weathering and corrosion.
- Aluminum Screws: Aluminum screws are lightweight and corrosion-resistant, making them suitable for certain outdoor applications. However, they may not be as strong as steel screws.
- Decking Nails or Screws: For decking projects, consider using nails or screws specifically labeled for decking applications. These are often treated or coated for outdoor durability.
How can I prevent rusting on outdoor fasteners?
While selecting the right type of outdoor fasteners is crucial, taking additional measures can help prevent rusting and extend the lifespan of your outdoor projects:
- Use Protective Coatings: Consider using screws with protective coatings or finishes designed for outdoor use. These coatings act as a barrier against moisture and corrosive elements.
- Regular Maintenance: Perform regular inspections of outdoor structures and fasteners. Replace any corroded or rusted fasteners promptly.
- Avoid Mixing Metals: Avoid mixing different types of metals in outdoor projects, as this can lead to galvanic corrosion. Use fasteners and hardware made from the same or compatible materials.
- Apply Lubricants or Sealants: Apply a rust inhibitor, lubricant, or sealant to the threads of outdoor fasteners. This provides an additional layer of protection against moisture.
- Pre-Drill Holes: When working with wood, pre-drill holes for screws to reduce the likelihood of splitting. This also minimizes stress on the fasteners.
- Use Ventilated Storage: When storing outdoor fasteners, ensure proper ventilation to prevent condensation and moisture buildup in storage containers.
- Elevate Structures: Elevate outdoor structures, such as raised garden beds or decks, to promote air circulation and reduce contact with soil and moisture.
By choosing the right materials and implementing preventative measures, you can significantly reduce the risk of rusting in outdoor fasteners and ensure the longevity of your outdoor projects.
Joinery and Construction
What type of fasteners are best for constructing furniture or cabinetry?
When constructing furniture or cabinetry, selecting the right fasteners is crucial for ensuring structural integrity and a professional finish. Here are some commonly used fasteners for these applications:
- Wood Screws: Wood screws are versatile and widely used in furniture and cabinetry. They come in various lengths and thicknesses, and their coarse threads provide excellent grip in wood.
- Confirmat Screws: Confirmat screws are designed specifically for particleboard and MDF. They have a large, flat head and deep threads, providing strong connections in engineered wood products.
- Dowels: Dowels are cylindrical rods often used in conjunction with glue to create strong, hidden joints. They are particularly popular for assembling cabinet frames and panels.
- Biscuit Joinery: Biscuit joinery involves inserting small, compressed wood biscuits into slots in the joined pieces. This method is effective for aligning and reinforcing joints in cabinetry and furniture.
- Pocket Hole Screws: Pocket hole screws are commonly used with pocket hole joinery systems. They create strong and concealed joints, making them suitable for constructing furniture frames and attaching cabinet components.
- Cam Locks and Dowels: Cam locks and dowels are often used in ready-to-assemble (RTA) furniture. They provide quick and secure connections, making assembly straightforward.
- Euro Screws: Euro screws, also known as hinge screws, are used in conjunction with European hinges. They are designed to provide secure attachment points for cabinet doors.
- Wood Glue: While not a traditional fastener, wood glue is an essential component in furniture and cabinetry construction. It enhances joint strength and stability.
- Nails and Brads: Nails and brads can be used for lightweight applications or where a more discreet fastening method is preferred. They are often combined with glue for added strength.
Are there specific considerations for joining materials at different angles?
Joining materials at different angles requires careful planning and the use of appropriate fastening methods. Here are some considerations:
- Miter Joints: For miter joints (45-degree angles), reinforce with dowels, biscuits, or spline joints in addition to glue. This helps prevent separation at the joint.
- Pocket Hole Joinery: Pocket hole screws and jigs are effective for joining materials at various angles. They allow for quick and secure connections, especially in furniture assembly.
- Dowel Joints: Dowel joints can be used at different angles. Use a doweling jig to ensure accurate alignment of dowel holes for strong and stable connections.
- Biscuit Joinery: Biscuit joinery is versatile and can be employed for joining materials at various angles. The biscuits help with alignment and contribute to joint strength.
- Specialized Fasteners: Explore specialized fasteners designed for specific angle joints. For example, angle brackets or corner braces can provide additional support.
- Reinforcement Methods: Depending on the application, consider reinforcing joints with additional methods such as corner blocks, L-brackets, or cleats to enhance stability.
- Accuracy in Cutting: Achieving precise angles through accurate cutting is crucial. Use a miter saw, table saw, or other suitable tools to ensure clean and accurate cuts.
- Test Fit Before Fastening: Always perform a test fit before applying fasteners. This allows you to confirm the accuracy of the angles and make any necessary adjustments.
By combining appropriate fasteners with precise cutting and reinforcement techniques, you can create sturdy and aesthetically pleasing joints, even when joining materials at different angles in furniture or cabinetry construction.
Fastener Compatibility
Can I use any screw with my power drill, or do I need specific bits for different screws?
While power drills are versatile tools, using the right drill bit for different screws is crucial for efficient and effective fastening. Here are some considerations regarding the compatibility of screws and power drill bits:
- Types of Screws: Different screws have varying head shapes and drive types, such as Phillips, slotted, square (Robertson), or Torx. Corresponding drill bits are designed to match these drive types.
- Drill Bit Size: The size of the drill bit should match the size of the screw. Using the correct bit size ensures that the screw fits snugly and provides optimal grip.
- Magnetic Drill Bits: Magnetic drill bits can be beneficial, especially for longer screws. The magnetic feature helps hold the screw in place, preventing it from falling off the bit during insertion.
- Impact vs. Standard Drill Bits: If you are using an impact driver, consider using impact-rated drill bits. These bits are designed to handle the additional torque generated by impact drivers.
- Depth and Length: Ensure that the drill bit is long enough to drill the pilot hole to the required depth without bottoming out in the chuck or adapter.
- Material Compatibility: Consider the material of the screw and the material you are fastening into. Different materials may require specialized drill bits for optimal performance.
- Wood Screws: For wood screws, standard wood drill bits are appropriate. These bits typically have a pointed tip and fluted design for efficient chip removal.
- Metal Screws: Metal screws may require a bit designed for metal drilling. High-speed steel (HSS) or cobalt drill bits are suitable for drilling into metals.
- Concrete Screws: Concrete screws require masonry drill bits designed for drilling into concrete or other masonry materials.
Are there compatibility issues between certain fasteners and materials?
Understanding the compatibility between fasteners and materials is crucial for ensuring secure and durable connections in various applications. Here are a few things to keep in mind:
- Material Hardness: Consider the hardness of the material you are fastening into. Using a fastener that is too hard for the material may result in difficulty during insertion or potential breakage.
- Corrosion Resistance: Choose fasteners made from materials that resist corrosion when working in environments with exposure to moisture or harsh weather conditions. For outdoor applications, stainless steel or galvanized screws are often recommended.
- Expansion and Contraction: Consider the expansion and contraction rates of materials. For example, when fastening materials that expand and contract due to temperature changes, flexible fasteners may be needed to accommodate movement.
- Wood Grain Orientation: When fastening wood, consider the orientation of the wood grain. Screws driven parallel to the grain generally provide better holding power than screws driven perpendicular to the grain.
- Thread Type: Different thread types are suited for specific materials. Coarse threads are often used in wood, while fine threads are suitable for metal. Self-tapping screws are designed to drill their own pilot holes.
- Weight and Load: Consider the weight and load-bearing requirements of the application. Choose fasteners with the appropriate load capacity and size for the intended purpose.
- Combination of Materials: When fastening different materials together, such as wood to metal, use screws specifically designed for such applications. These screws often have features to accommodate the different materials.
By matching the right drill bits to the screws and considering material compatibility, you ensure efficient and secure fastening without causing damage to the fasteners or materials. Always refer to the manufacturer's recommendations for the specific screws and materials you are working with.